How to import eventbrite events to Airtable with 5 easy methods
Mariam Ispiryan • June 21, 2022 • 9 min read
Your most recent Eventbrite event is coming up soon and you are scrambling to plan it. You want to gather all the possible data from previous events and also conduct competitor research to showcase the high chances of your event being a success. For this, you’ll need a platform that focuses on managing and storing data, which also has the ability to sync with Eventbrite.
The tool you’re looking for is Airtable. The tool provides a way for companies to start and operate project workflows, store and manage data, and much more.
Today, we will demonstrate 5 quick ways to set up the syncing process of Airtable and Eventbrite to save you hours of work.
Let’s go!
Table of Contents
- Import Eventbrite events data as a CSV file
- Import Eventbrite events data with CSV Import app
- Import Eventbrite events data to Airtable with Data Fetcher and SimpleScraper
- Import Eventbrite data to Airtable with Zapier
- Import Eventbrite events data to Airtable with Make
One of the best things about Airtable is its flexibility.
Connect your Airtable database to Softr and build beautiful no-code web apps in minutes.
Importing Eventbrite events data as a CSV file
If you don’t want to become a premium user to access the CSV import app and are looking for something less customizable, importing the CSV file can be possible with the following instructions.
Step 1: Export Eventbrite Events data as a CVS file,
Eventbrite has a separate section where you can go through all the data connected with your event.
We chose to export the “Attendee Summary” report, here’s how:
Now, let’s get back to importing the CSV file to Airtable
Step 2: Open the view where you want to import your file.
Step 3: Click “Add or Import” next to the list of tables.
Step 4: Click the “CSV file”.
Step 5: Select the CSV file to import. (Note, the file size limit on CSV uploads is 5MB)
The imported adjustment dialog will pop up, where you can preview your CSV file, and adjust field mappings before importing.
After you’re done with changes, click the “Import” and you have your Eventbrite events data successfully imported to Airtable.
One of the best things about Airtable is its flexibility.
Connect your Airtable database to Softr and build beautiful no-code web apps in minutes.
Import Eventbrite events data with CSV Import app
CSV import app is an Airtable app available for premium users and has a 25,000-row limit. The CSV import app allows you to customize and edit the imported records and merge data with existing ones.
To work with the CSV import app, open the base where you want to import your Eventbrite events and follow the instructions:
Step 1: Install the CSV import app by clicking the "Apps" button at the top right corner of your view.
Step 2: Click the "Install an app" button.
Step 3: Find and install the CSV import app.
Step 4: Import the Eventbrite CSV file into the app.
Step 5: Configure settings and field mappings before importing the CSV file into your base.
These were the default steps required for importing Eventbrite events data to Airtable. The next steps are optional but important if you want to import your data without difficulties.
Additional steps
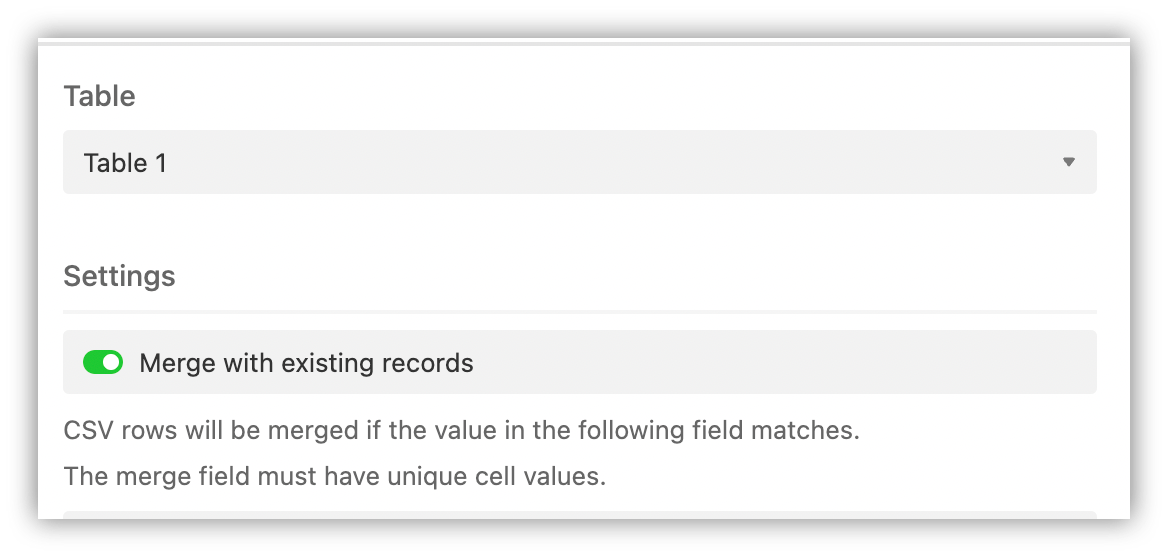
Step 6: If your table has existing records, enable the “Merge with existing records”.
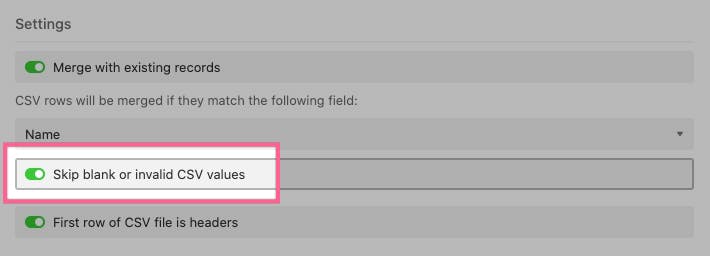
Step 7: Toggle on “Skip blank or invalid CSV values", if there are blank fields in the CSV.
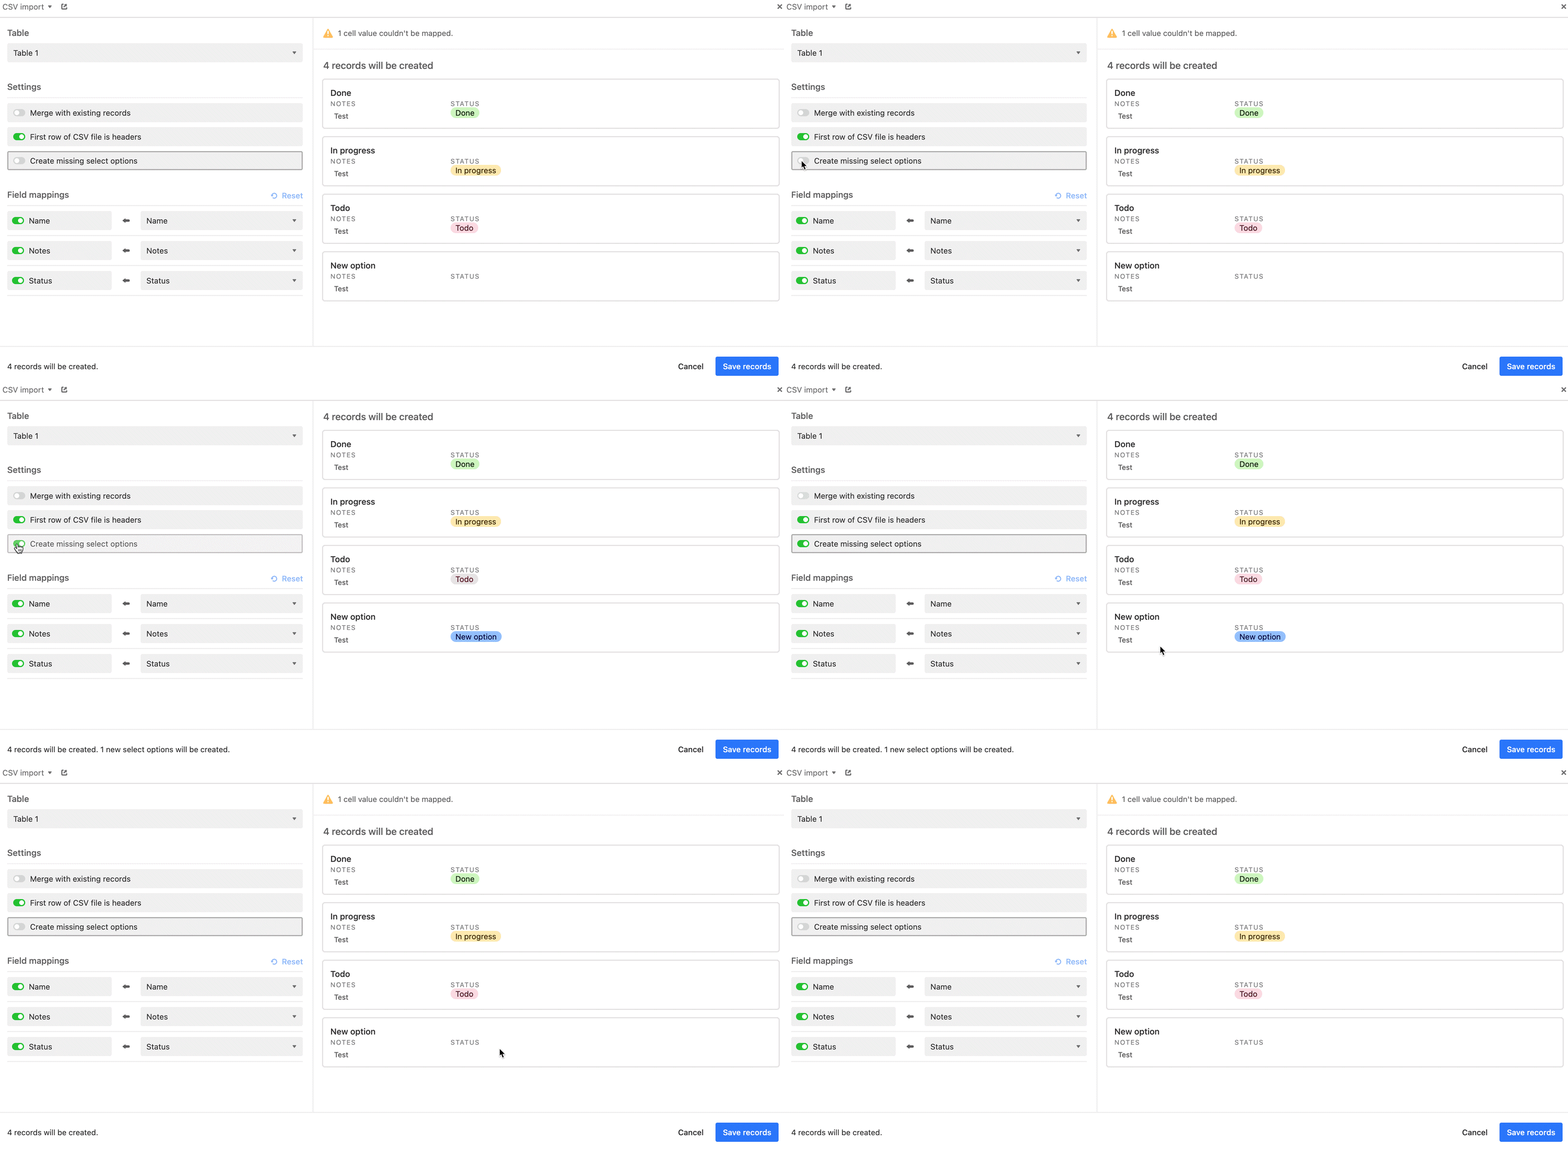
Step 8: Enable “Create missing select options” to create a new option in case there are single/multiple-select fields in your table.
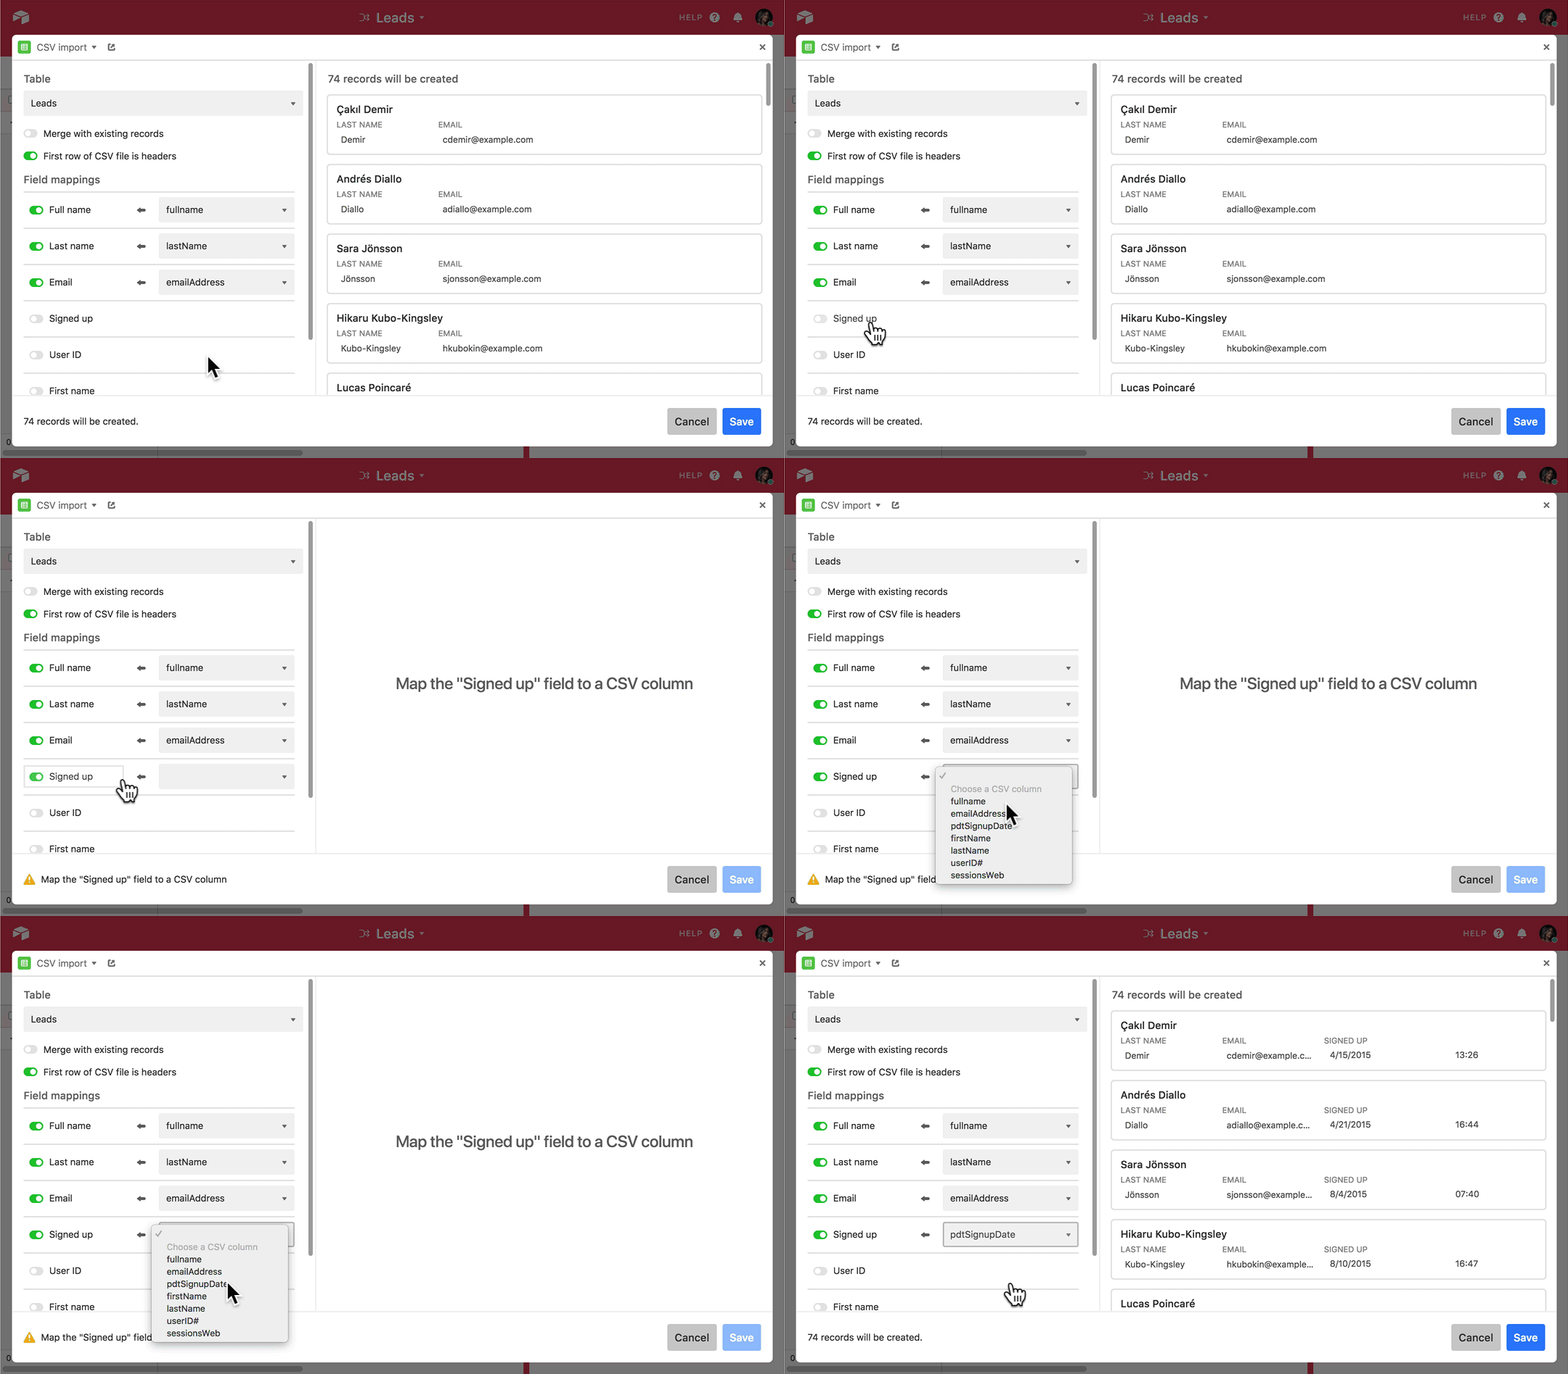
Step 9: Set field mappings to match Airtable rows with your CSV file.
To successfully set field mappings, select the field toggle, choose a column from the drop-down menu, and map the value.
One of the best things about Airtable is its flexibility.
Connect your Airtable database to Softr and build beautiful no-code web apps in minutes.
Import Eventbrite events data to Airtable with Data Fetcher and SimpleScraper
Data Fetcher is another option Airtable offers to sync many platforms with Airtable for its users with the “Plus” or higher plan. But, at the moment, Data Fetcher alone won’t help you with importing Eventbrite Events to Airtable. That’s where Simplescraper comes to the rescue. Simplescraper is a Chrome extension, designed to be the most simple and powerful web scraper you've ever used in no code.
The method will be handy if you need to gather data on different events. (More on this later)
With Simplescraper, we will scrape all the required data from Eventbrite to then import the data to Airtable with Data Fetcher.
Let’s get it started!
Scrape Eventbrite events data with Simplescraper
To scrape data from Eventbrite follow the instructions below:
Step 1: Go to the Chrome app store and download the Simplescraper extension.
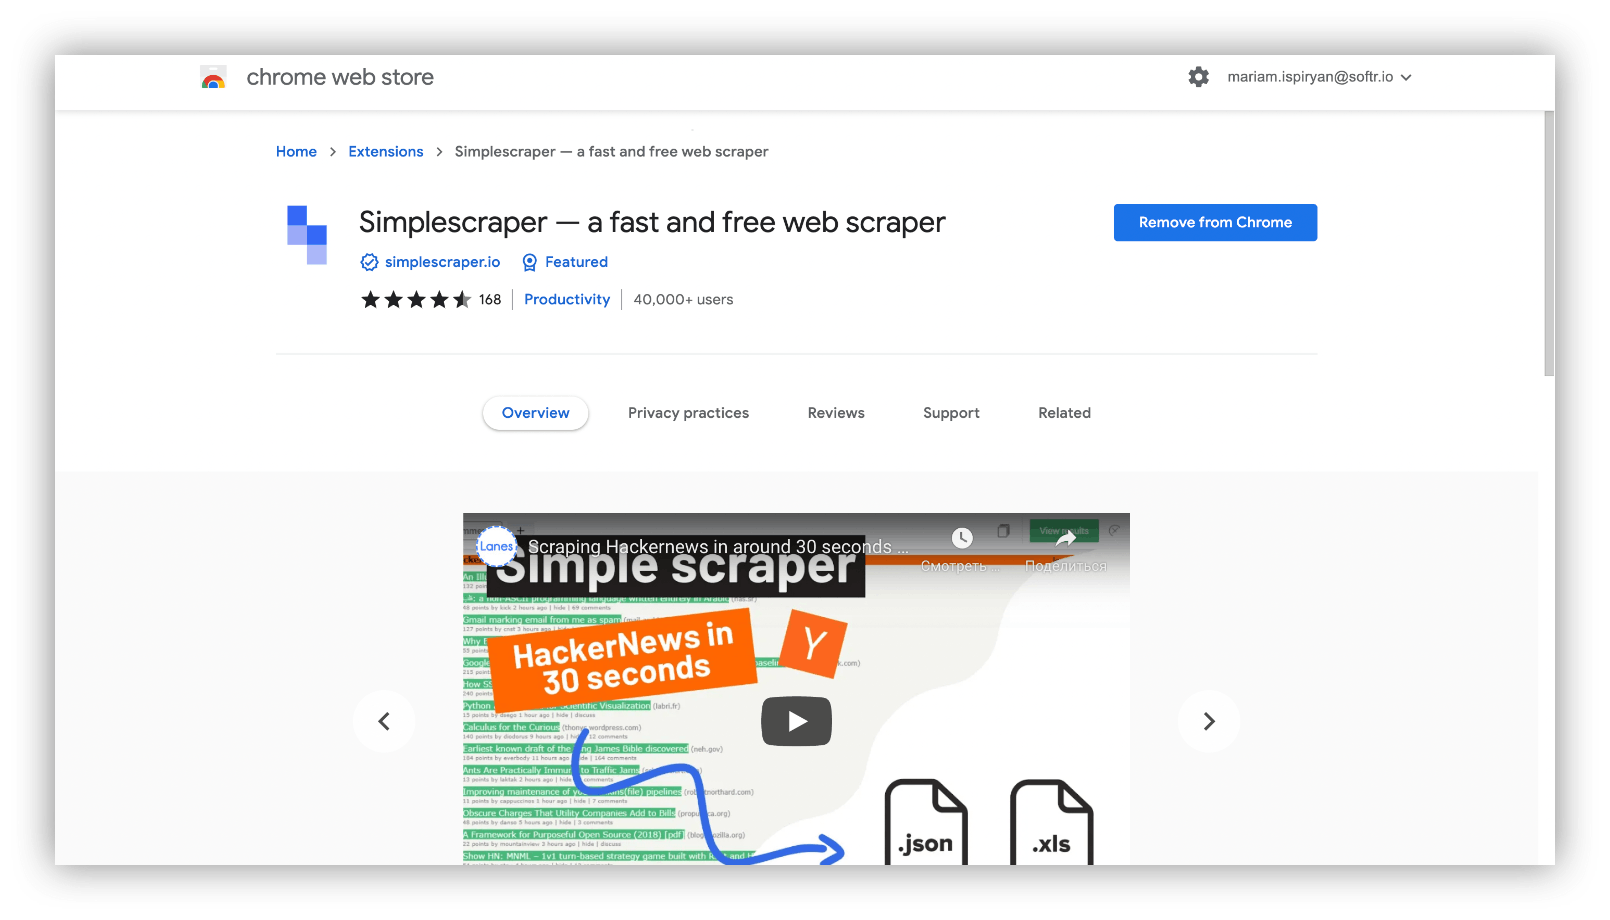
Step 2: Go to the Eventbrite Events page you want to scrape. We want to scrape data on Eventbrite online events page.
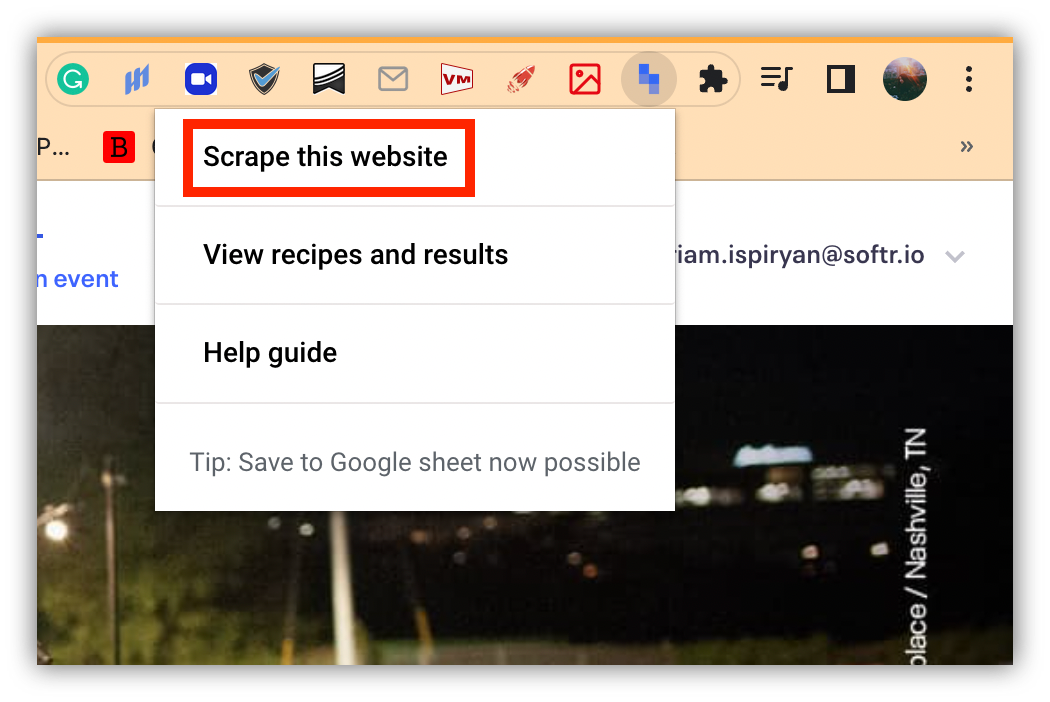
Step 3: From the Google Chrome extension menu at the top right corner of the page, track Simplescraper and click on the icon and choose “Scrape the website”.
Step 4: At the top of the page a new bar will appear, where you should click on “Add a property”.

Step 5: Add and name properties to proceed. Each property presents a different type of data you want to scrape
Step 6: Select the item you want to scrape, by clicking on the screen where the element is located.
Simplescraper allows scraping URLs, image URLs, names, and dates.
Step 7: Change the CSS selector, at the button of the bar for the tool to scrape the data successfully. You can get the CSS selectors from here. On the contrary, Data Fetcher recognizes the types of data with their default CSS selectors.
We want the scrape all the names, dates and images of the online events:

Step 8: After you’re done, click “View Results”.
Step 9: Click “Save recipe” in the left sidebar and sign up for Simplescraper.
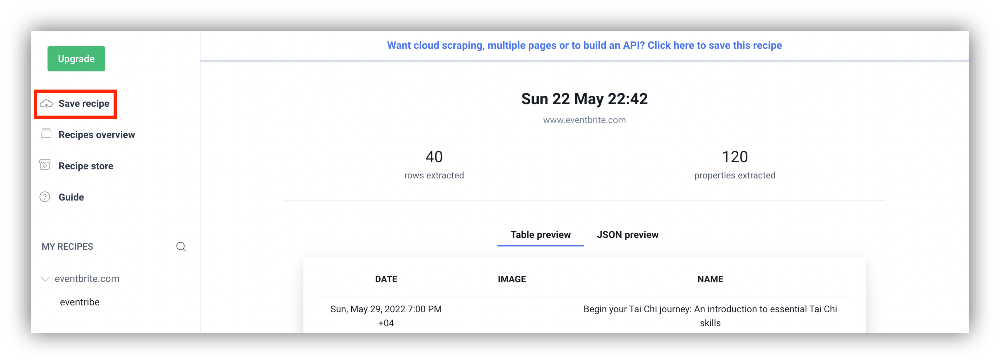
Step 10: Sign up for a free Simplescraper account.
Step 11: Enter a name for the recipe.
Step 12: Click on 'Create recipe' at the bottom of the screen.
Step 13: Click on the recipe under 'My Recipes'.
Step 14: Click on 'Run recipe' and let the recipe run.
Step 15: Go to the Eventbrite API section and copy the API.
That would be it. You can also download the CSV file and import Eventbrite events data with the CSV import app or as a CSV file as we showcased above.
Import Eventbrite events data with DataFetcher
Step 1: Install the Data fetcher app from the Airtable marketplace you can find in the right upper corner of your base
Step 2: Create a free account and start a new request
Step 3: The request screen will pop up where you could select “Custom” from the Application’s menu.
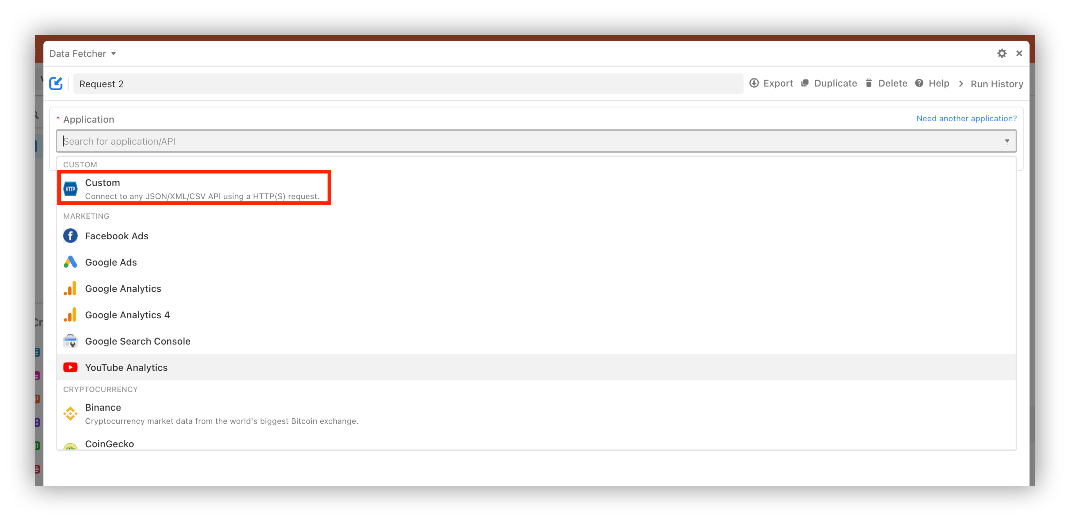
Step 4: Enter a Name for your request.
Step 5: For URL, enter the Eventbrite API URL you copied from Simplescraper.
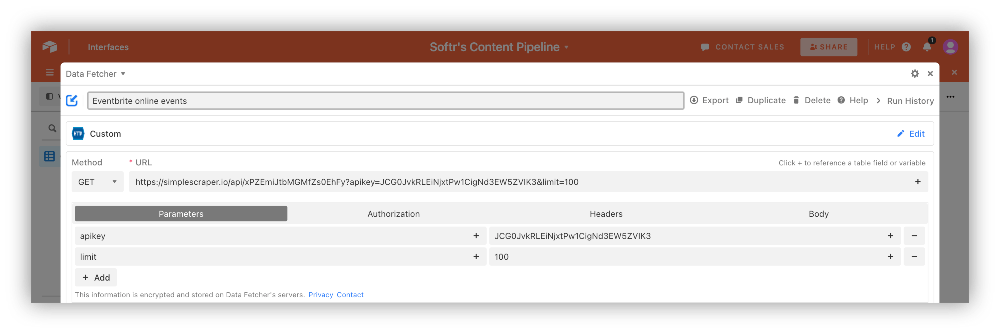
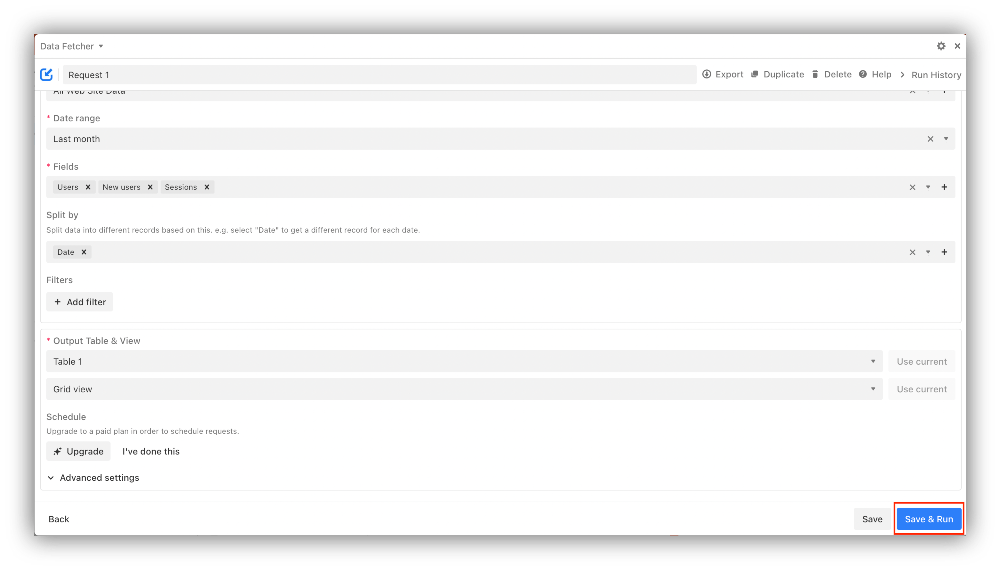
Step 6: Select the Airtable Output Table & View you want to pull in Eventbrite Events into.

Step 7: Click 'Save & Run'.
The request will run and the Response field mapping tab will open., Select how the Eventbrite fields should be mapped to Airtable rows.
Step 8: Once you’re done with field mapping, click 'Save & Run'.
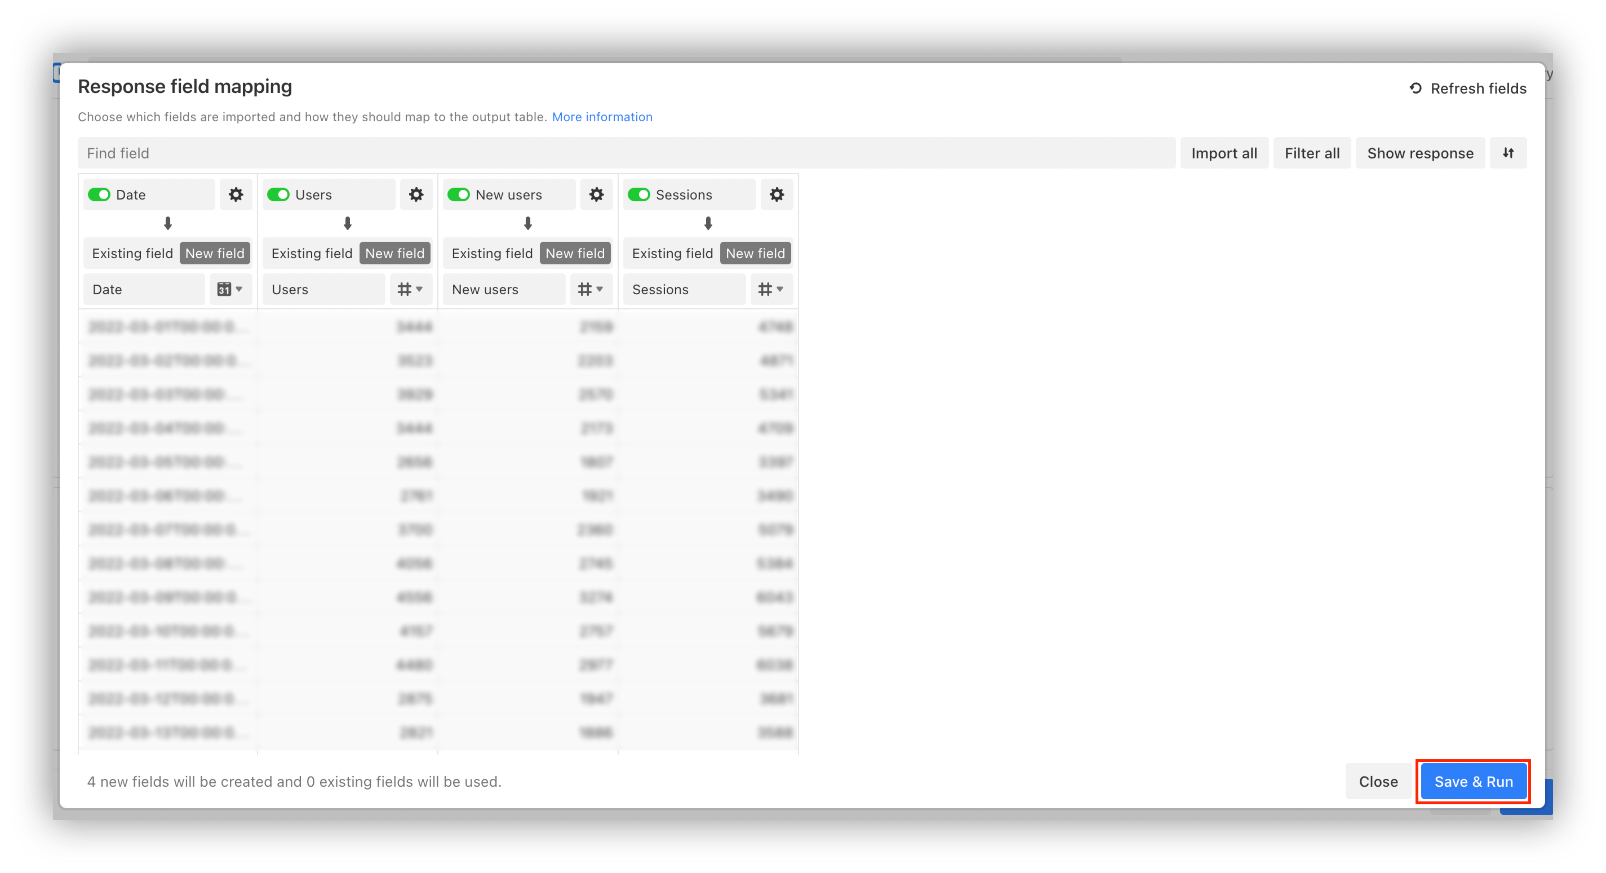
Data Fetcher will create the fields in the output table, run the request and import the data from Eventbrite to Airtable.
These were all the steps required for syncing Eventbrite with Airtable manually and for free.
One of the best things about Airtable is its flexibility.
Connect your Airtable database to Softr and build beautiful no-code web apps in minutes.
Import Eventbrite data to Airtable with Zapier
Zapier is an automation tool that allows end-users to integrate the web applications they use and automate workflows. Zapier is one of the best automation tools which will also help you sync Eventbrite with Airtable.
With Zapier you can pull data on new Eventbrite attendees and copy new Eventbrite events to Airtable.
In our example, we will create a trigger when an attendee registers for our sample event.
Connect Eventbrite with Zapier
Step 1: Sign in/sign up to Zapier.
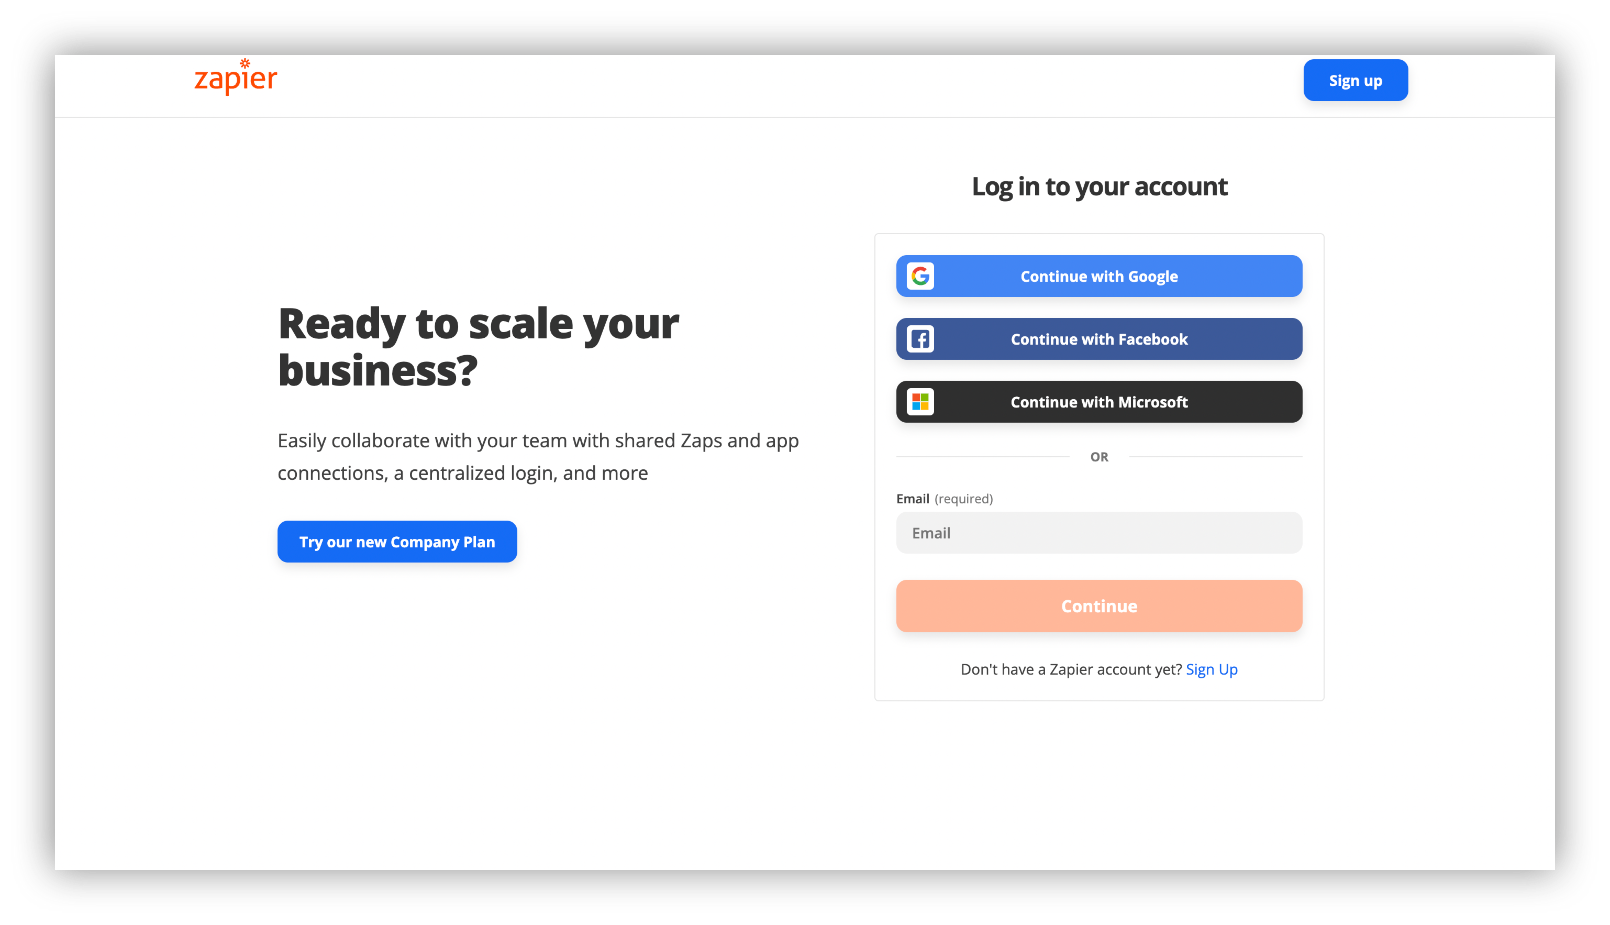
Step 2: Go back to the Eventbrite x Airtable page and click on the “Connect Airtable + Eventbrite” button to get started.
Step 3: Select or connect an Eventbrite account
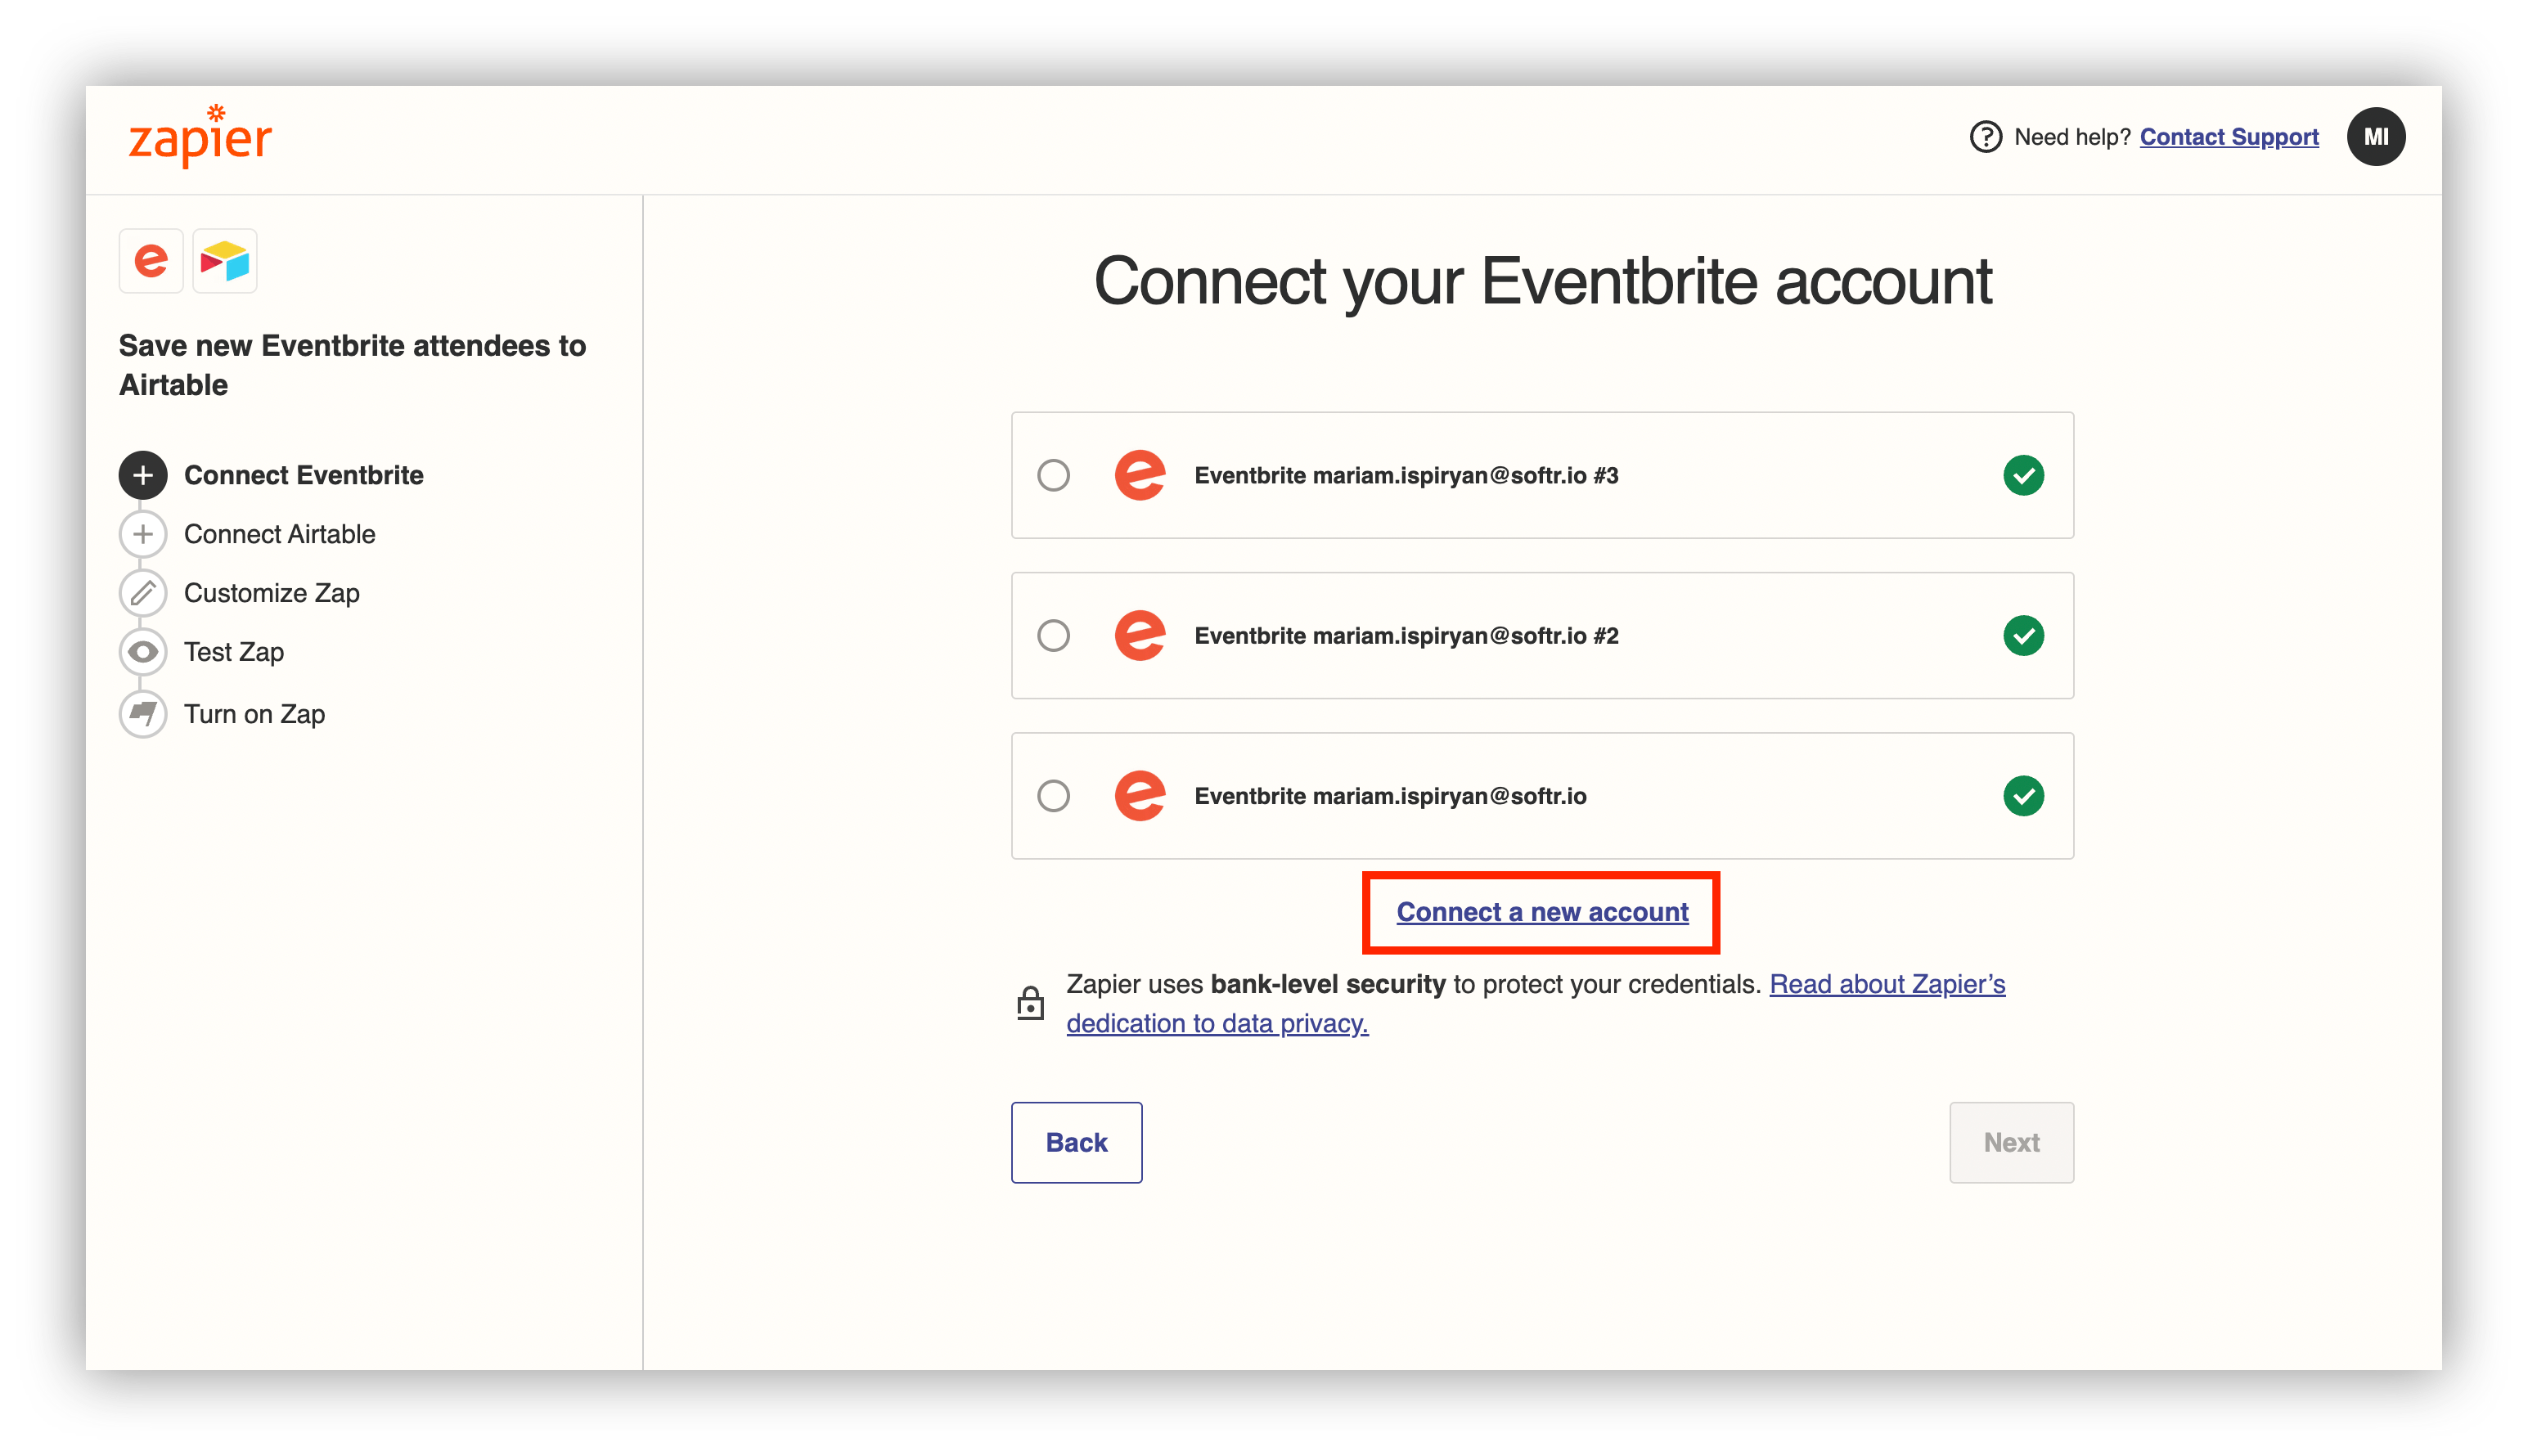
Step 4: If you're connecting a new account, allow Zapier to access your Eventbrite account.
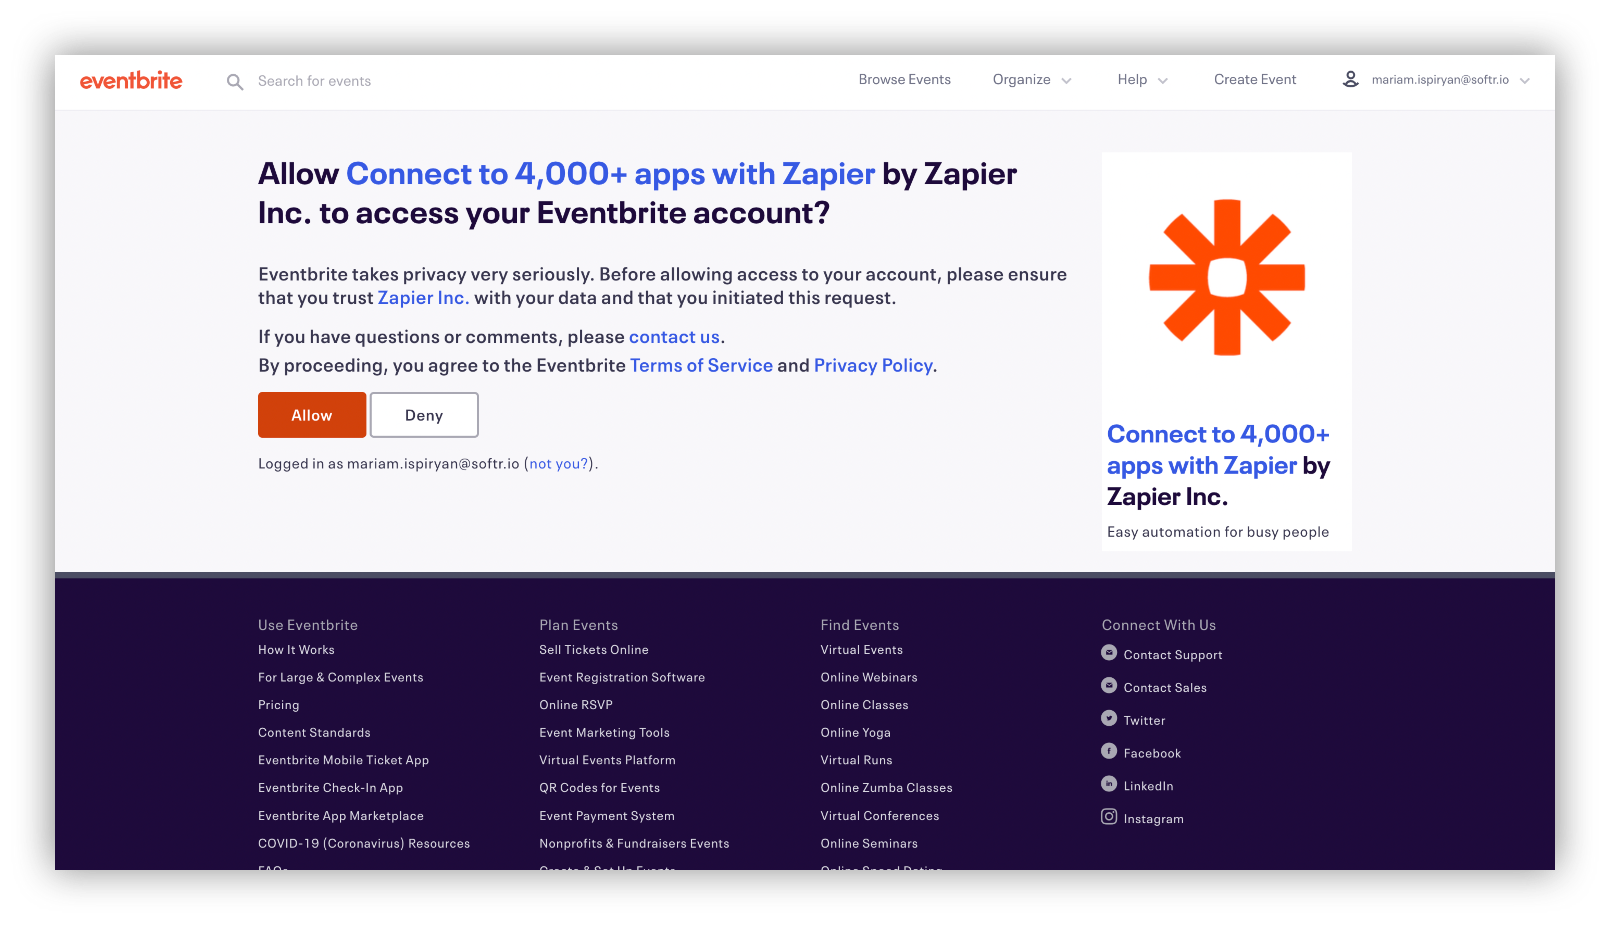
Step 5: Select the name of the person or the organization who owns the event and click “Next”.
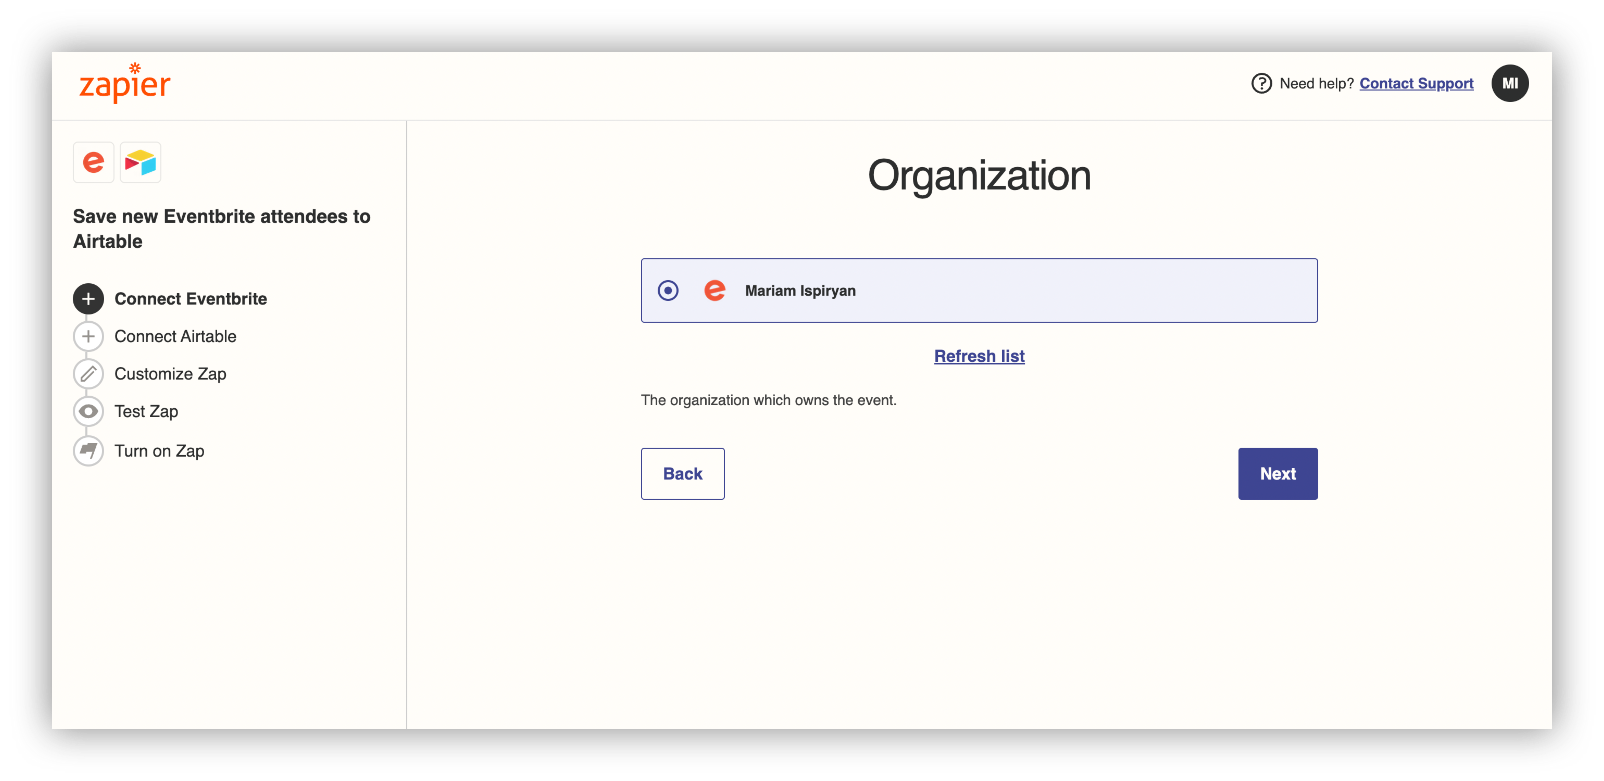
Step 6: Select the types of events you want to see in the imported data.
Step 7: Select the event you want to set a trigger for.
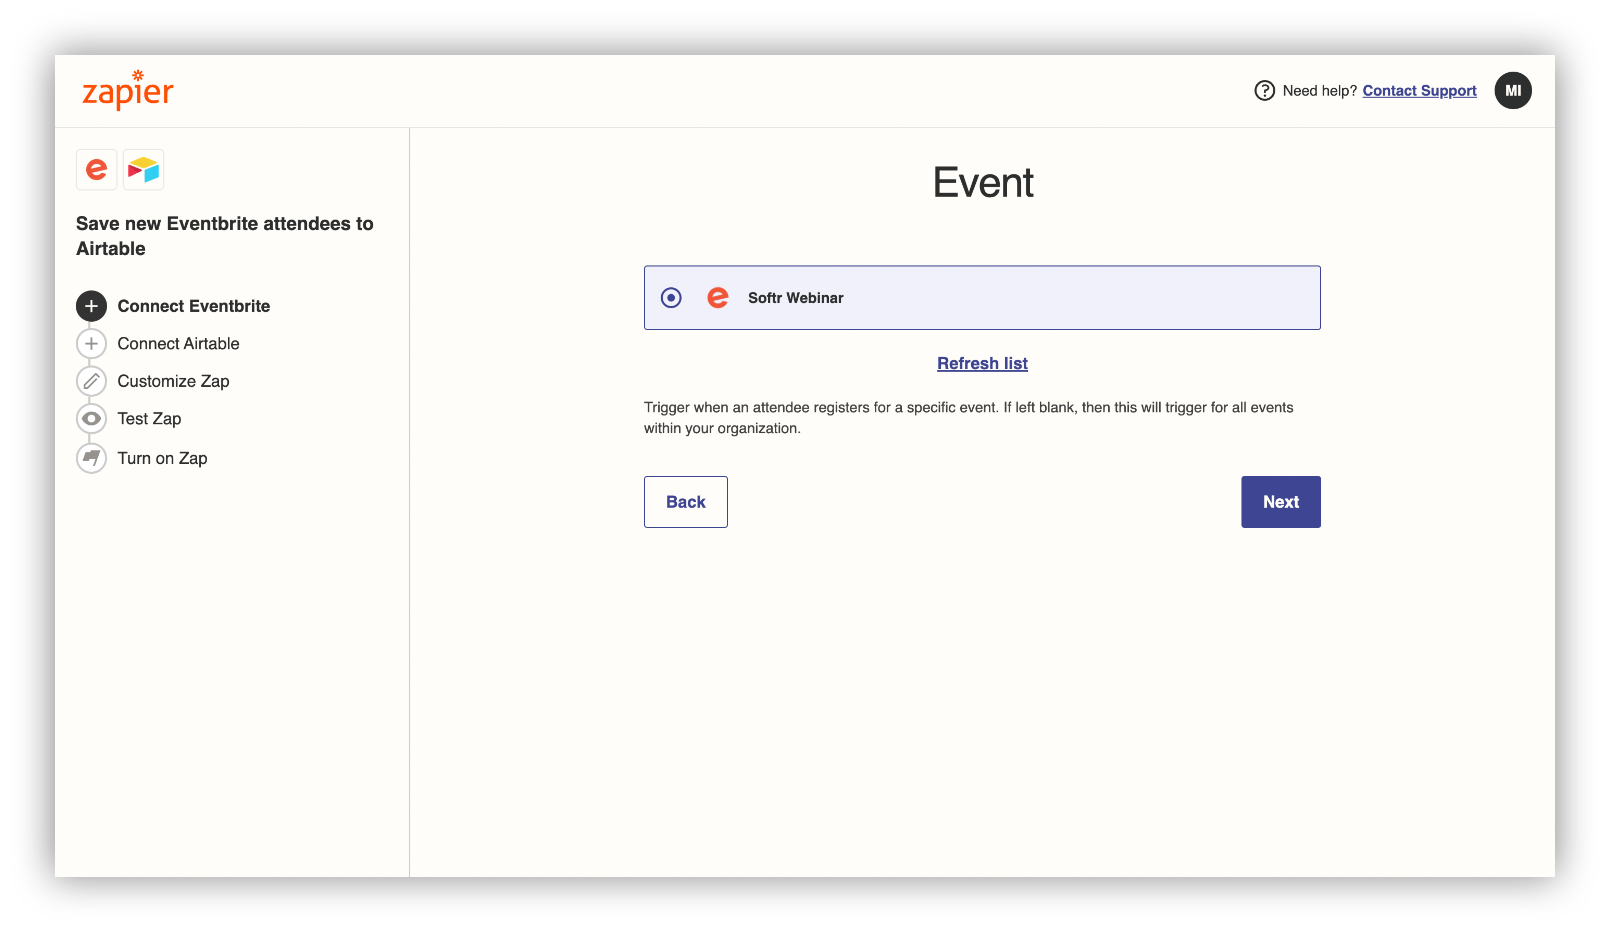
That would be all you need to do for connecting Eventbrite to Zapier.
Moving on to connecting Airtable to Zapier.
Connect Airtable to Zapier
Step 1: Connect a new account or proceed with a pre-connected Airtable account.
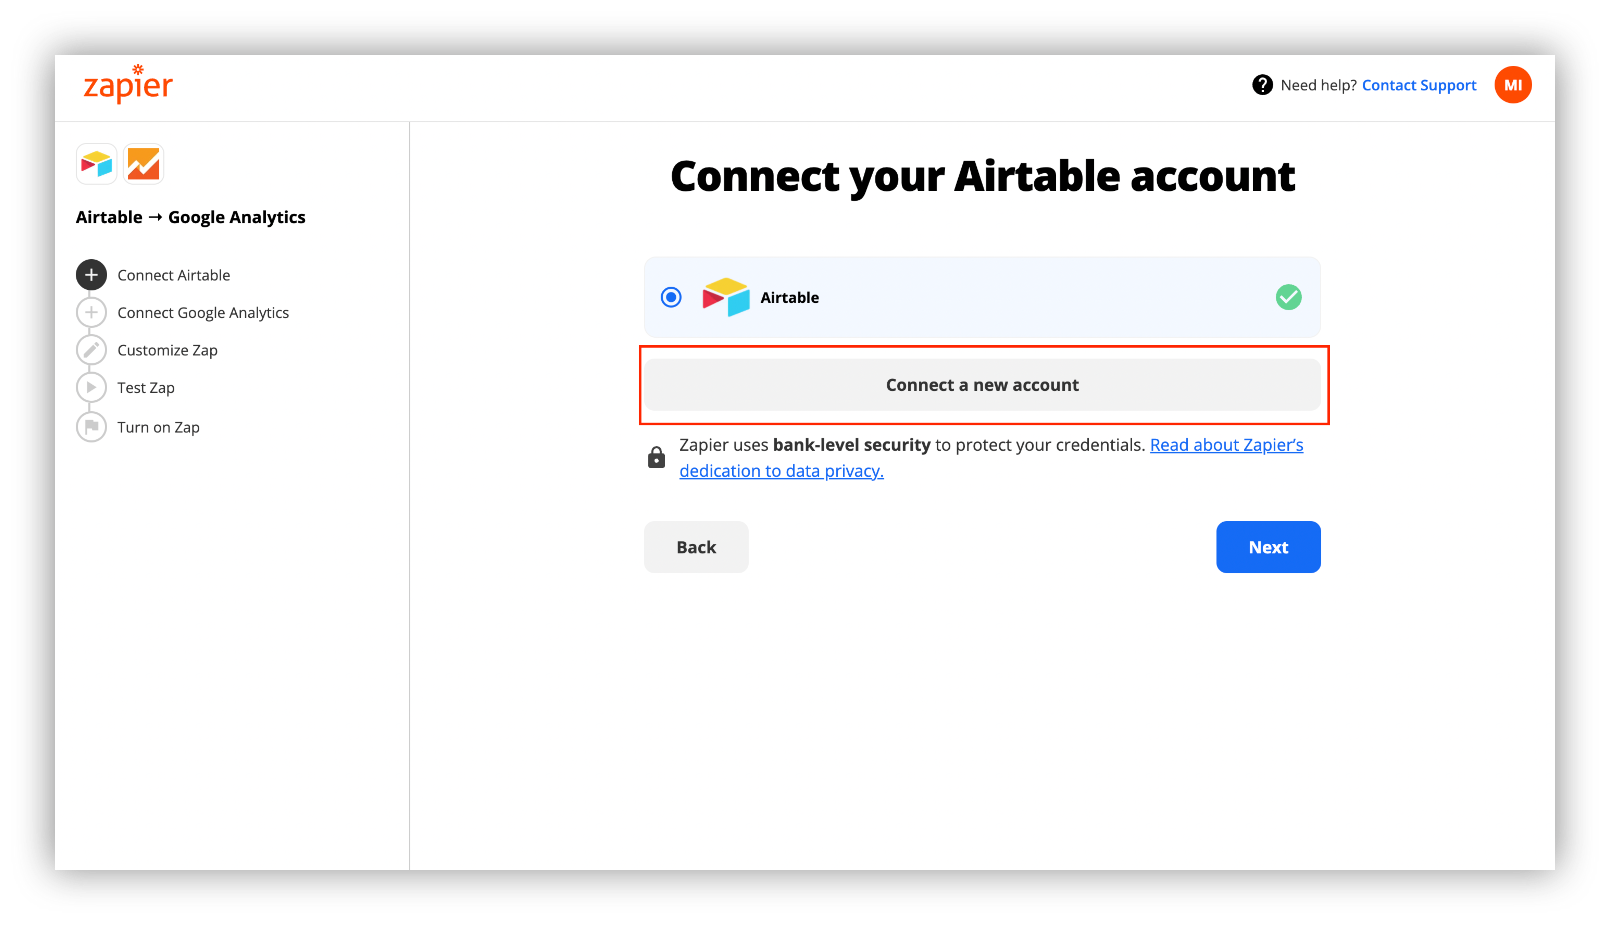
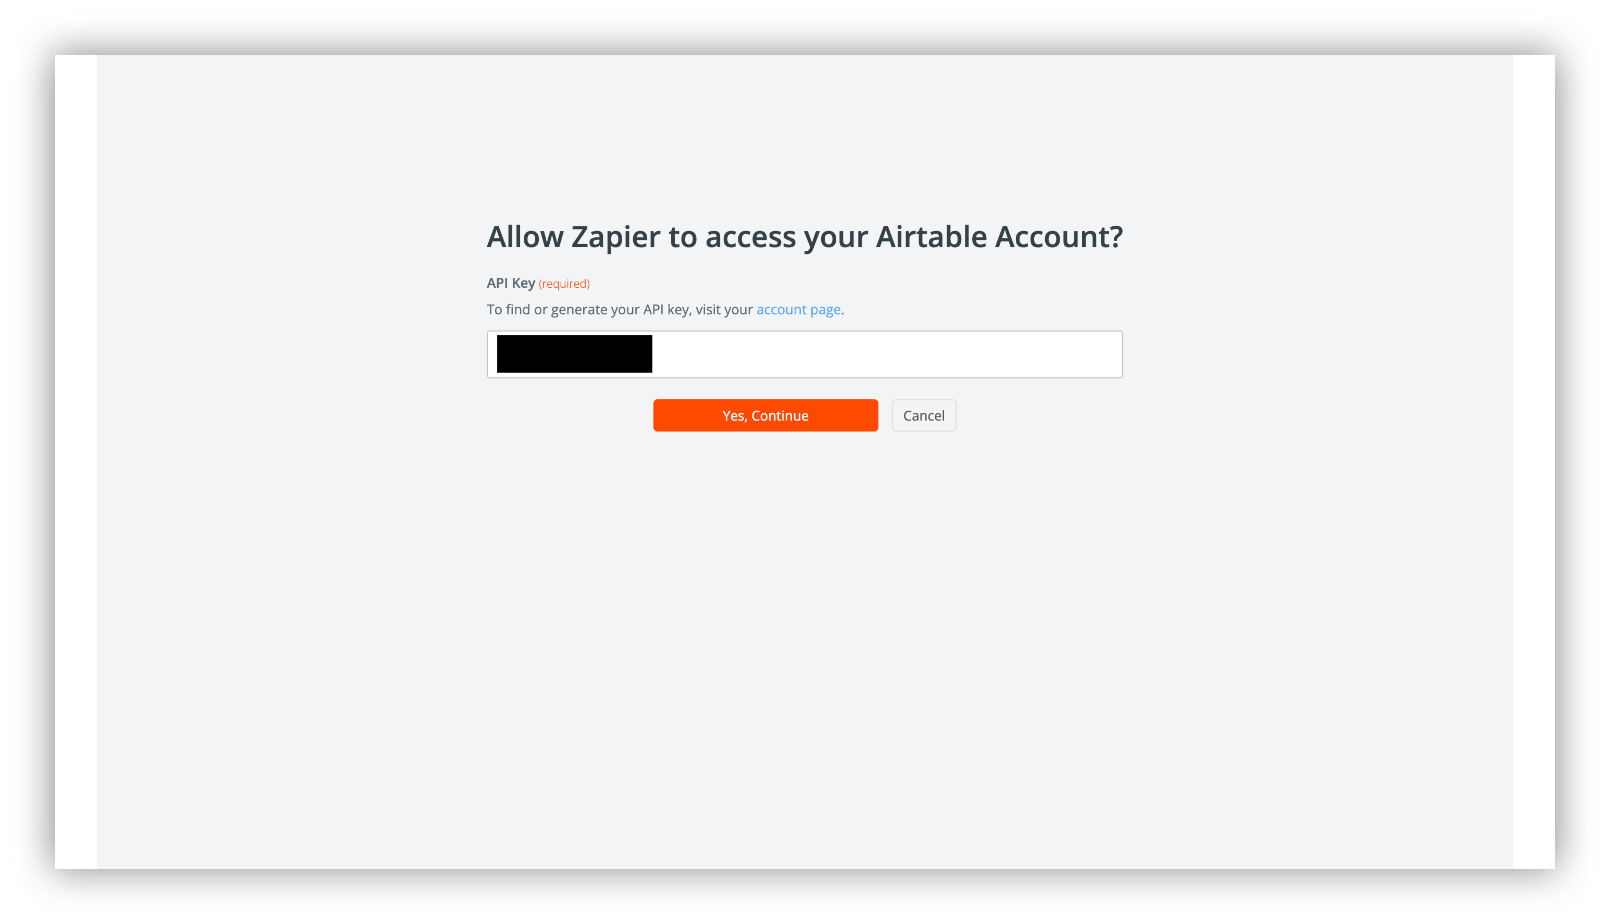
Step 2: A new window will pop up where you should enter your Airtable API.
You can get your API key from your account page.
Step 3: Click “Yes, Continue”, once you enter your API key.
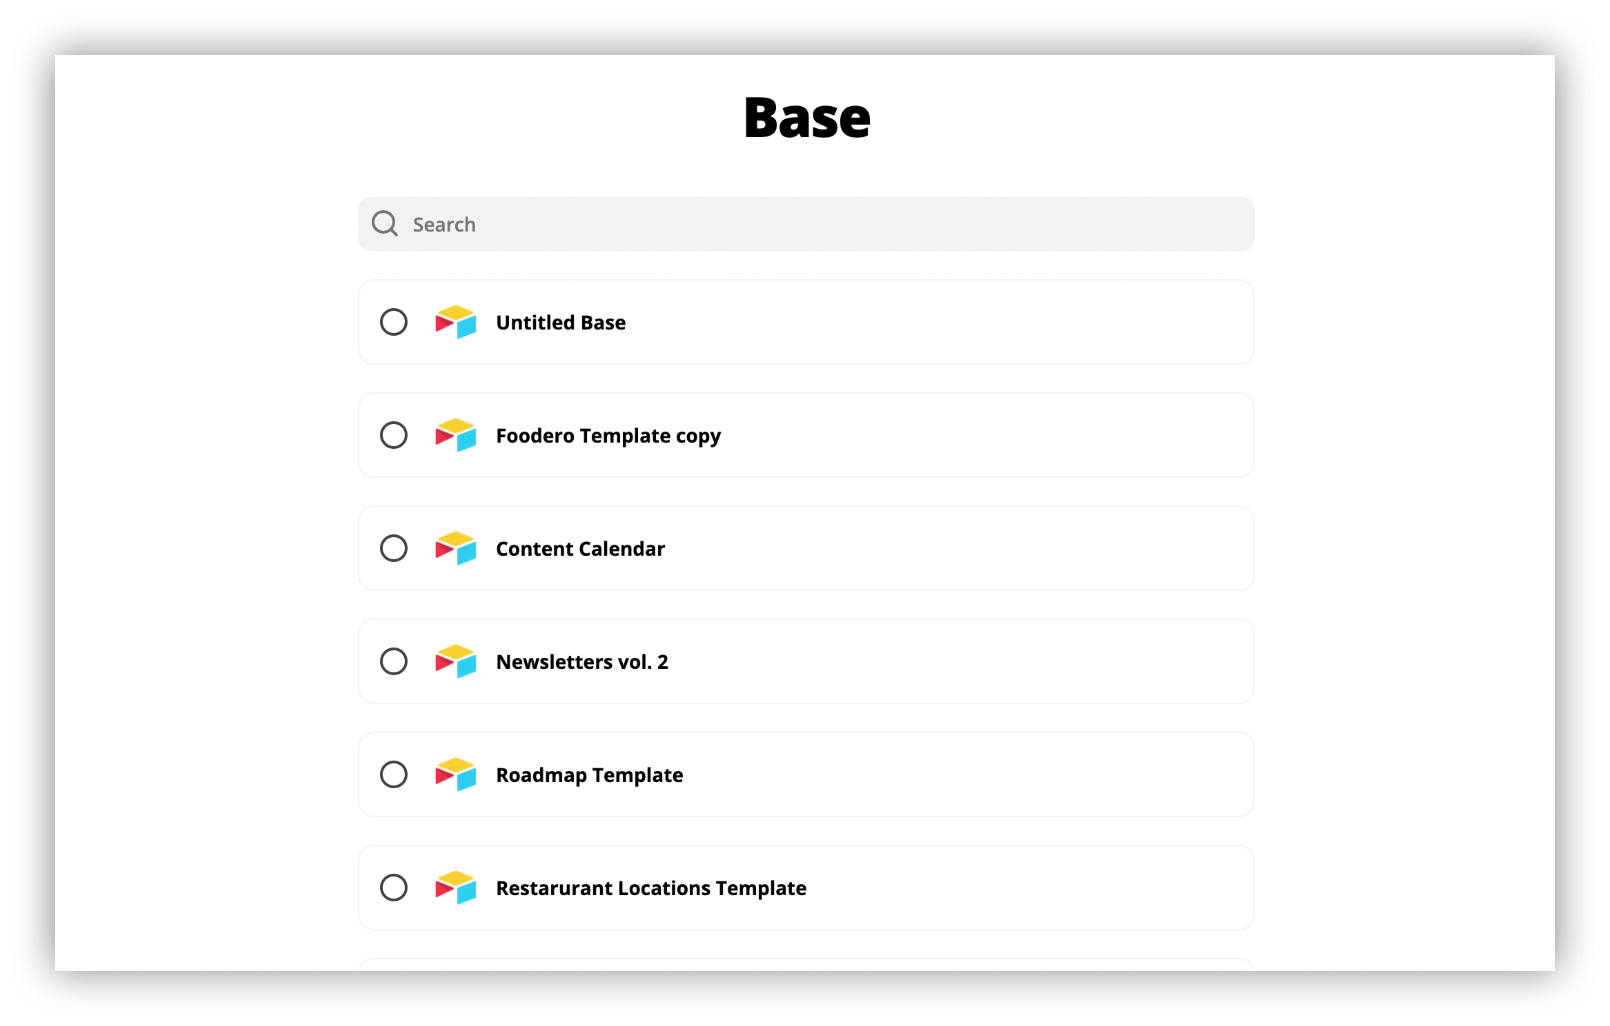
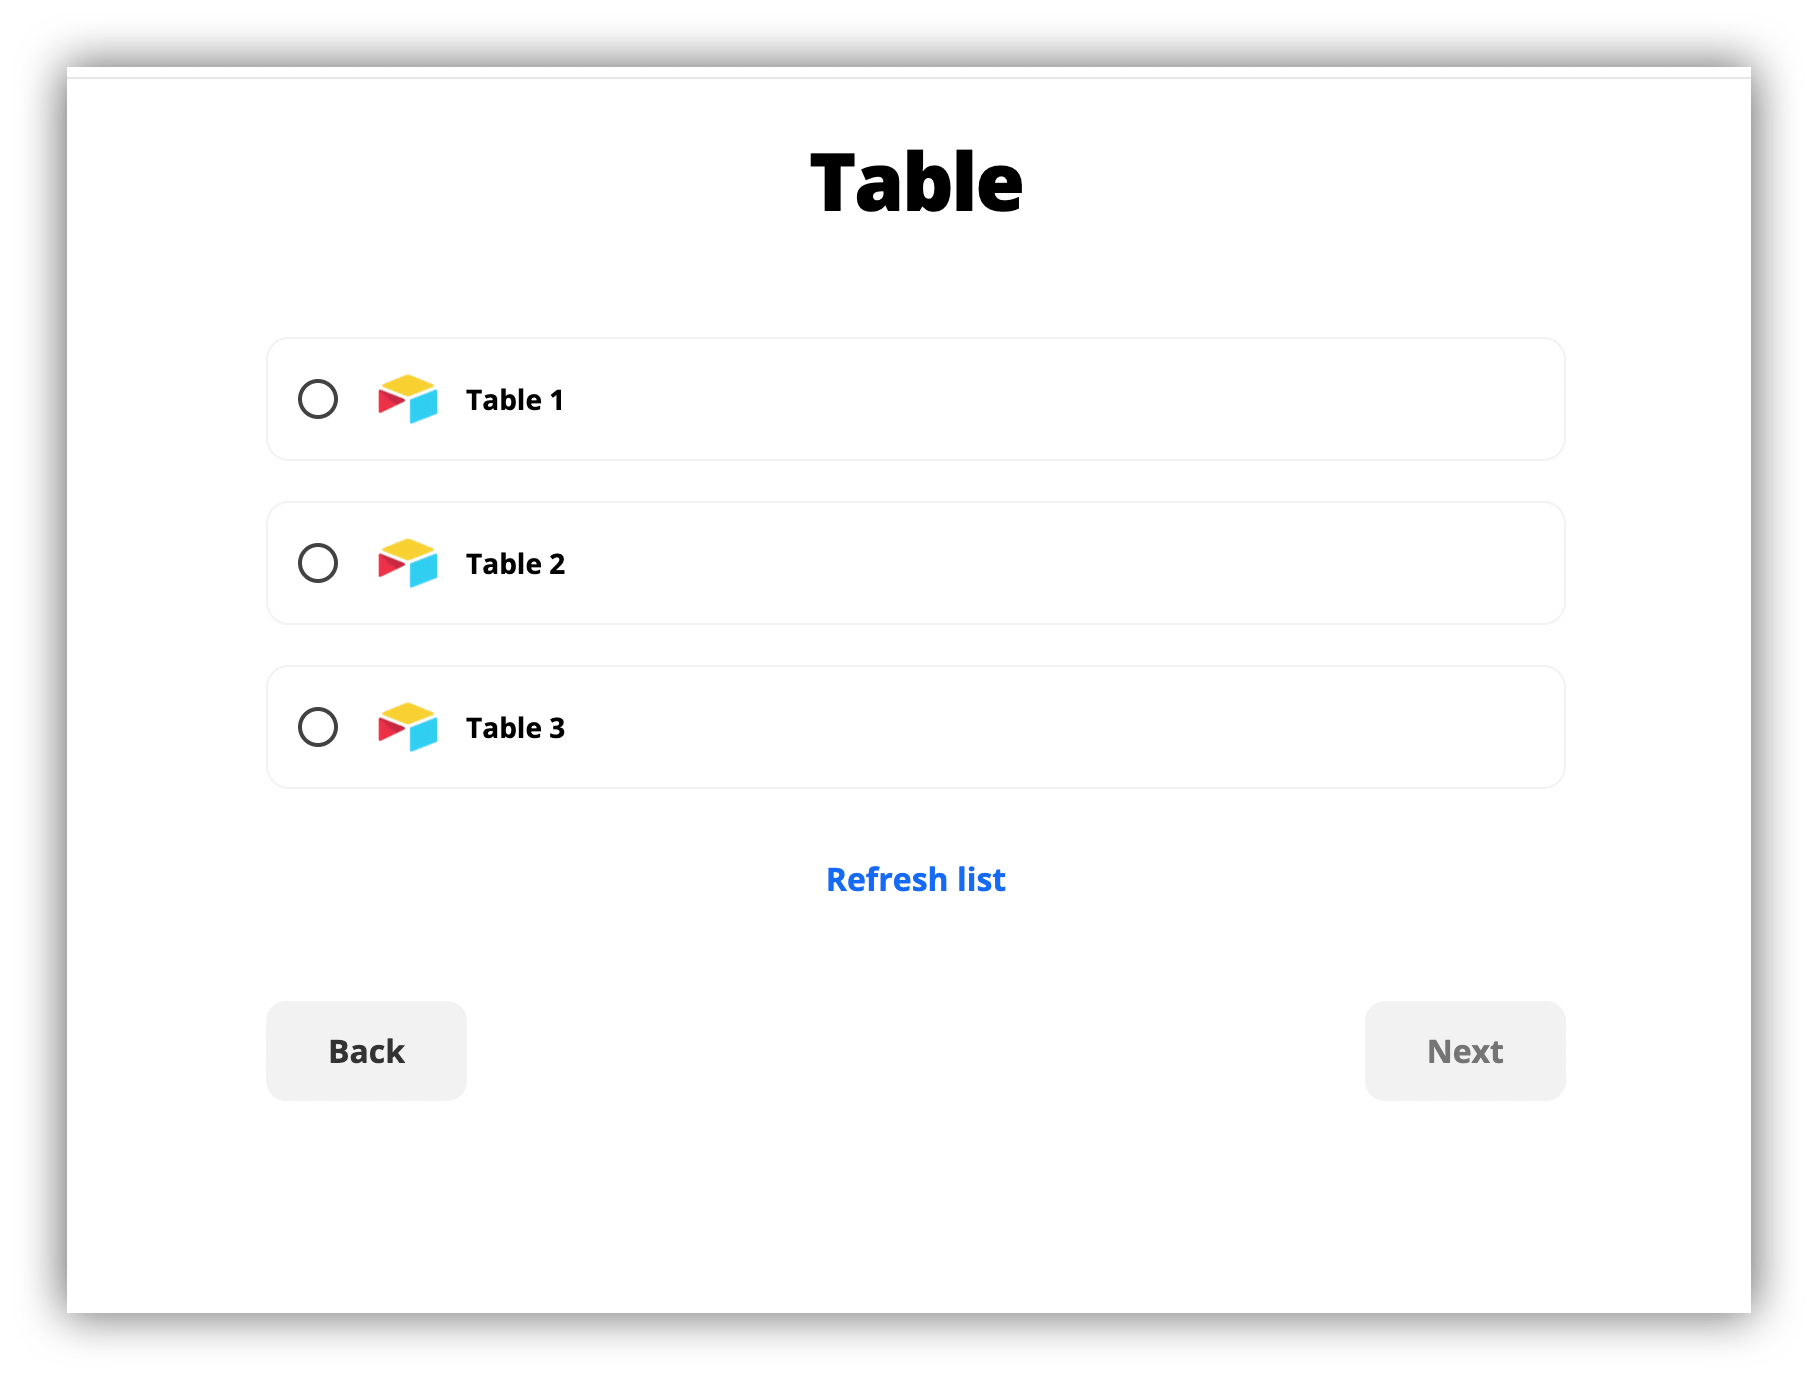
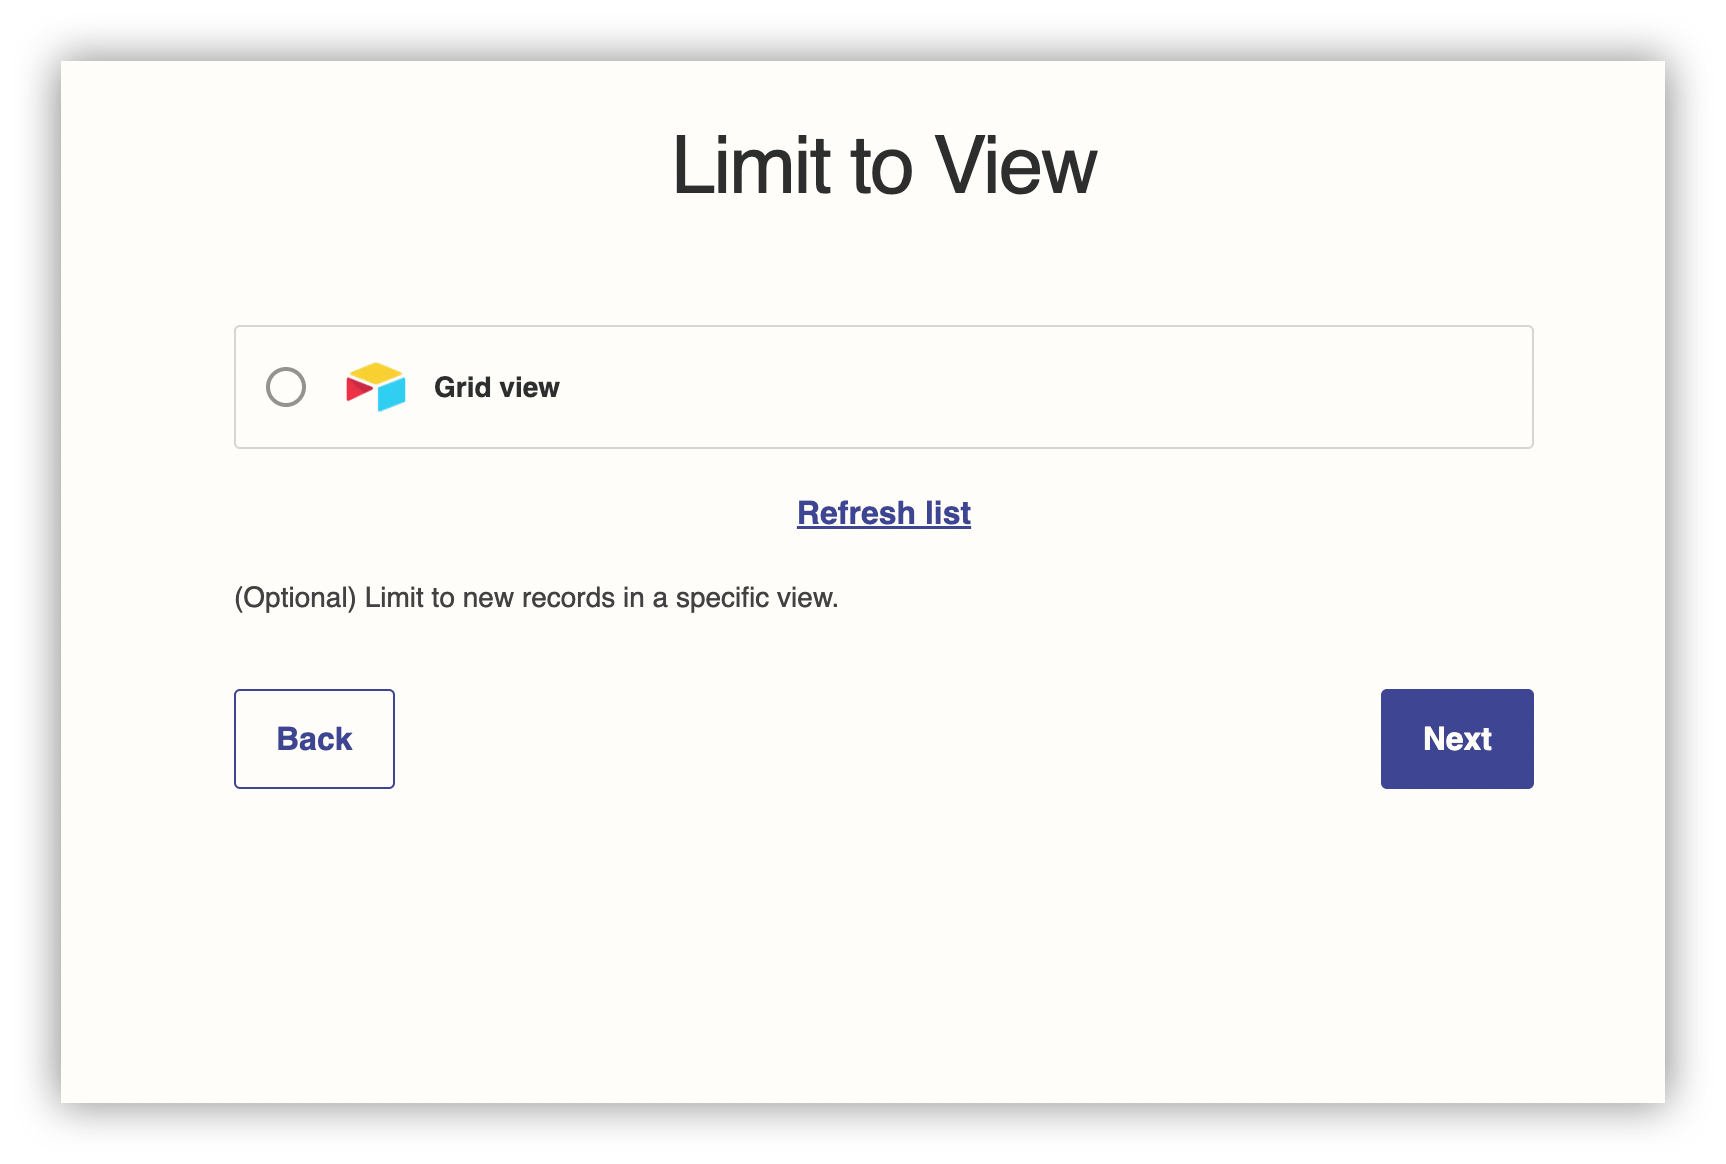
Step 4: Choose an output base, and a table for data importing.
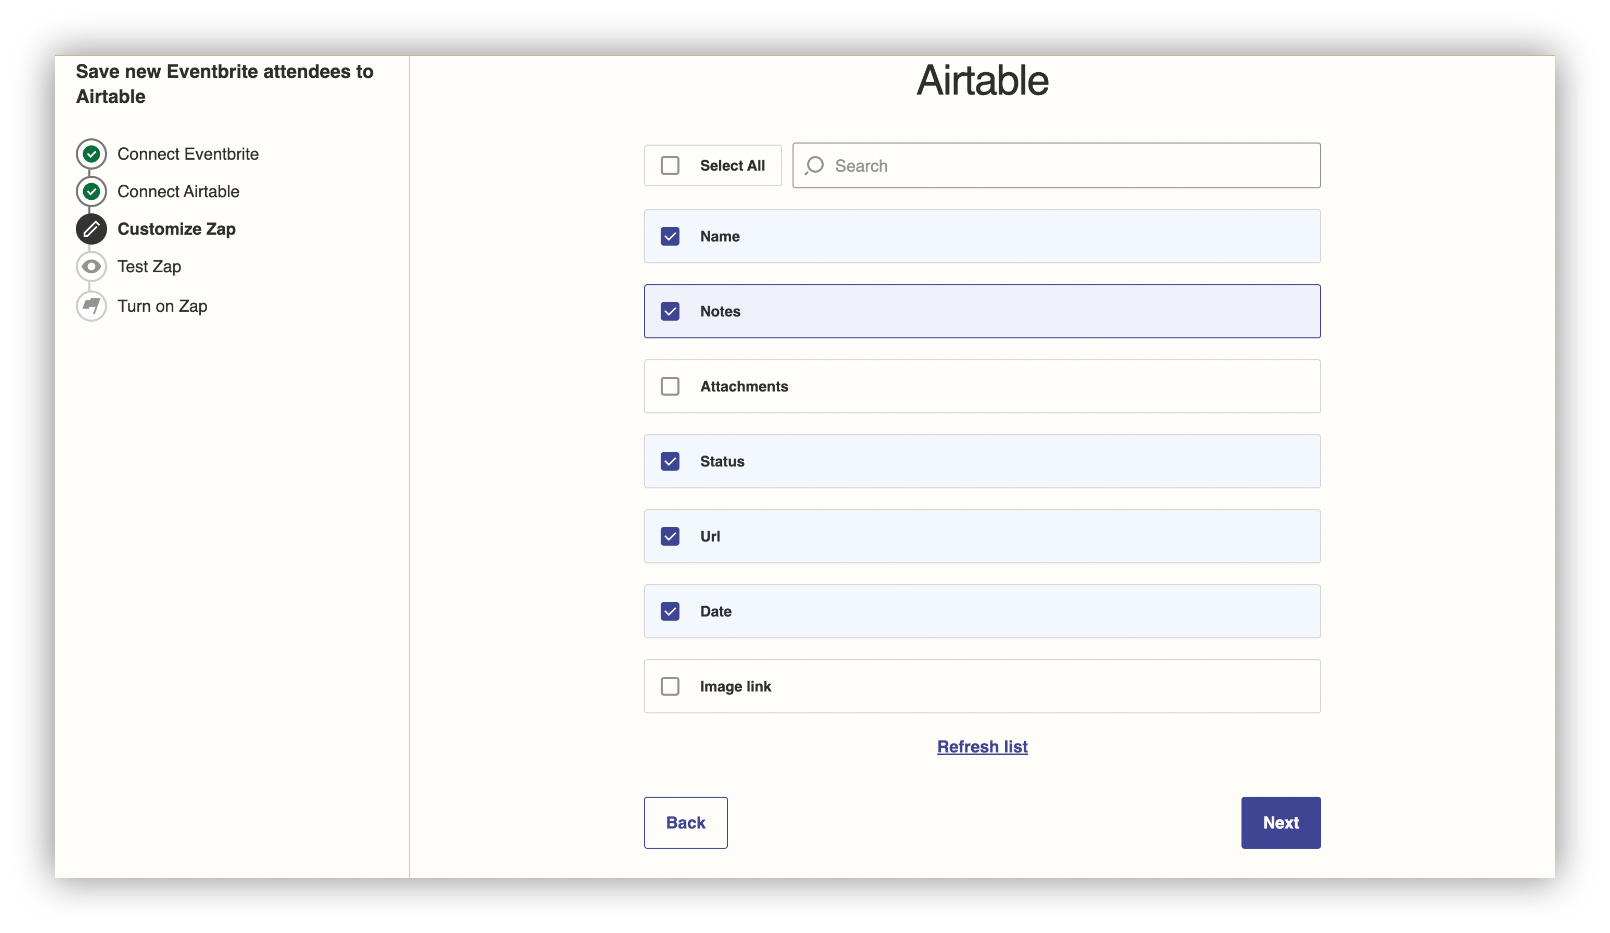
Step 5: Select the fields you want to edit in the output table.
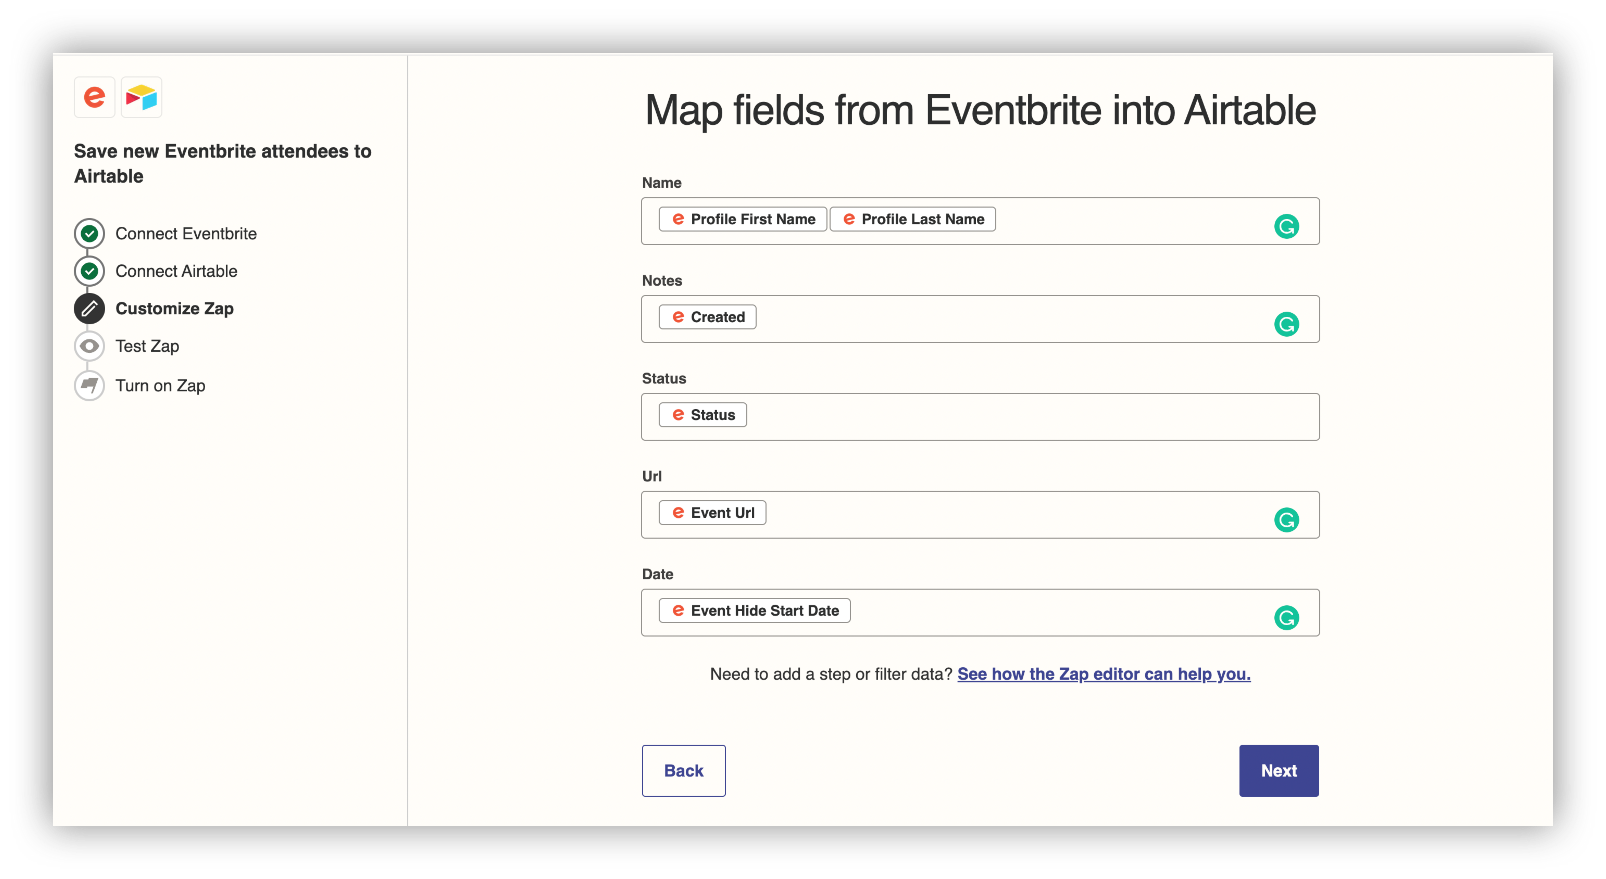
Step 6: Map fields from Eventbrite into Airtable
Step 7: Test out the Zap.
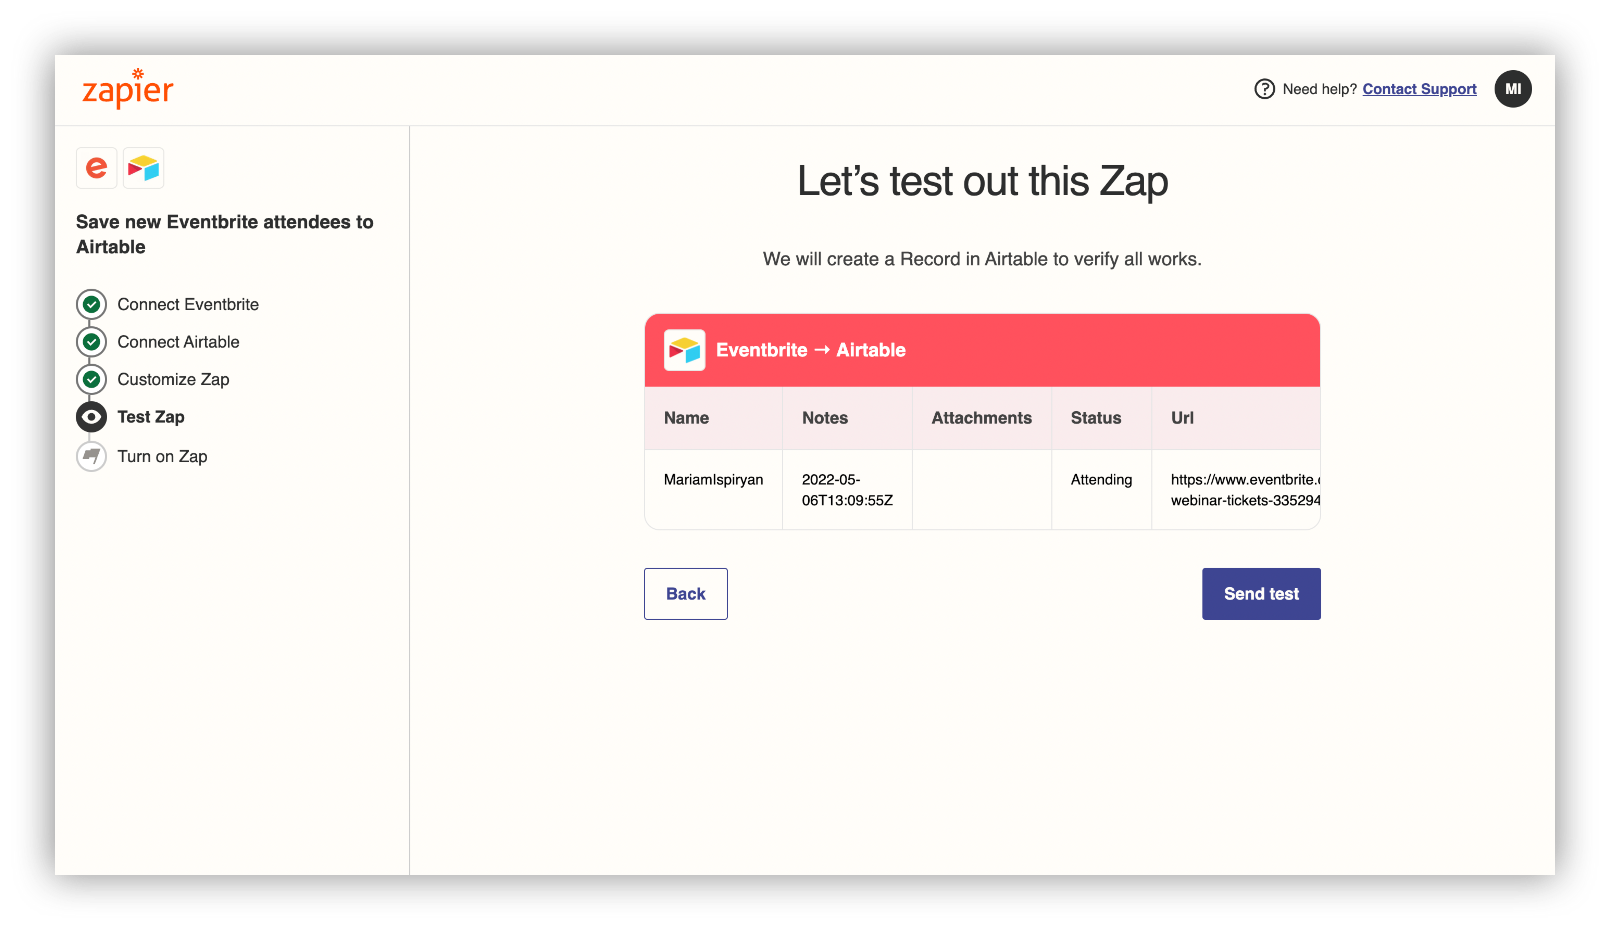
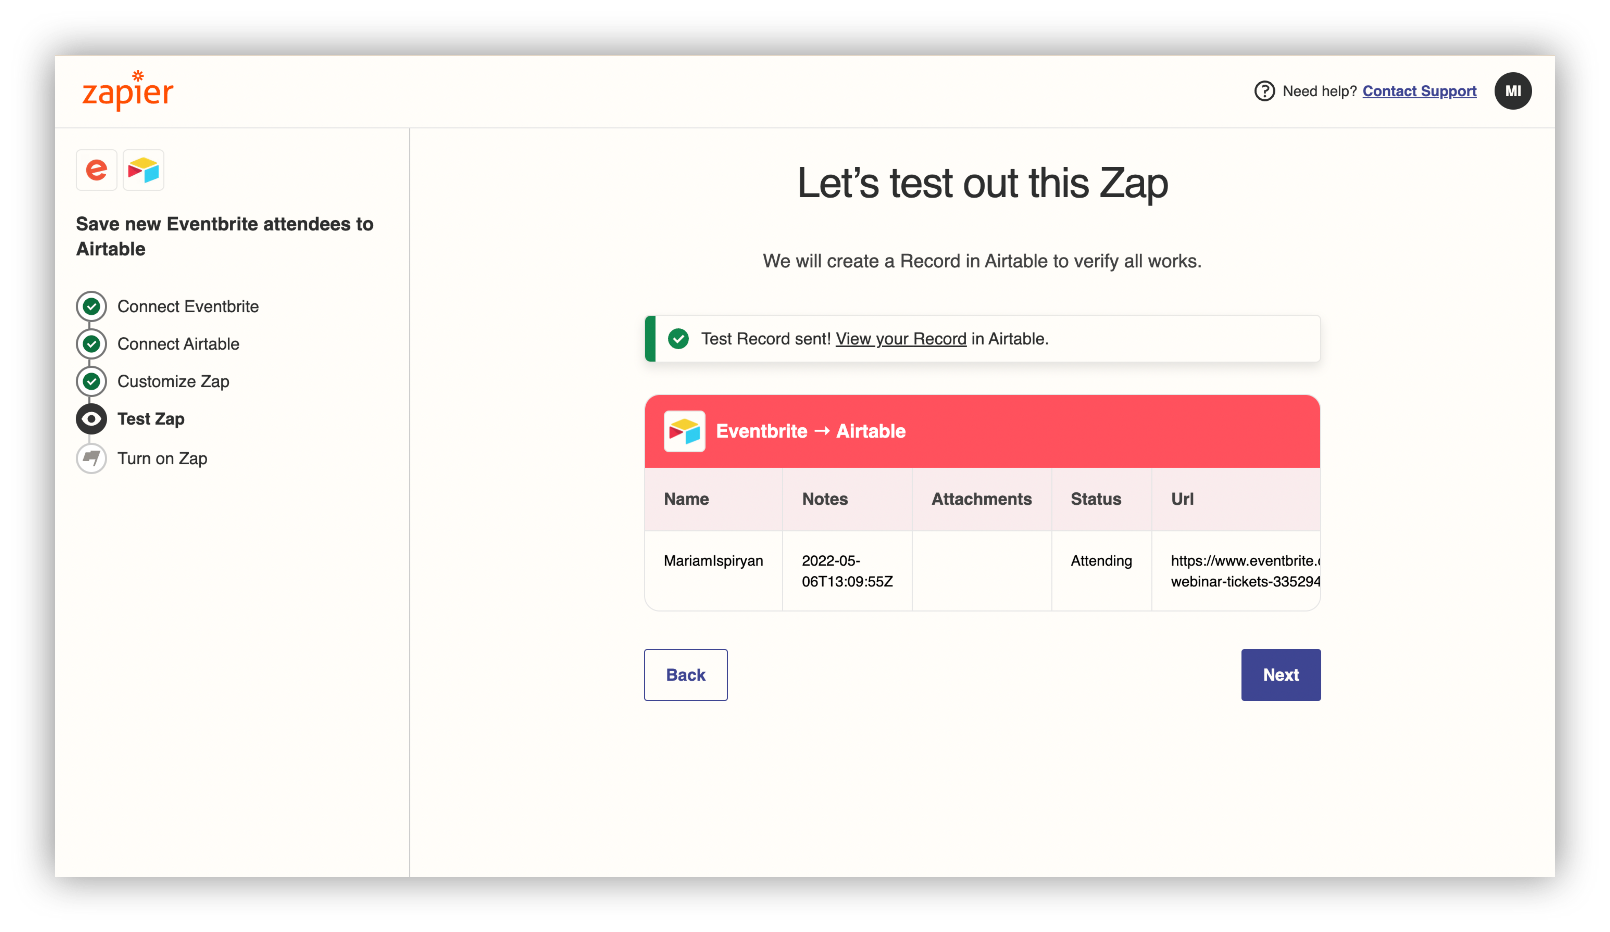
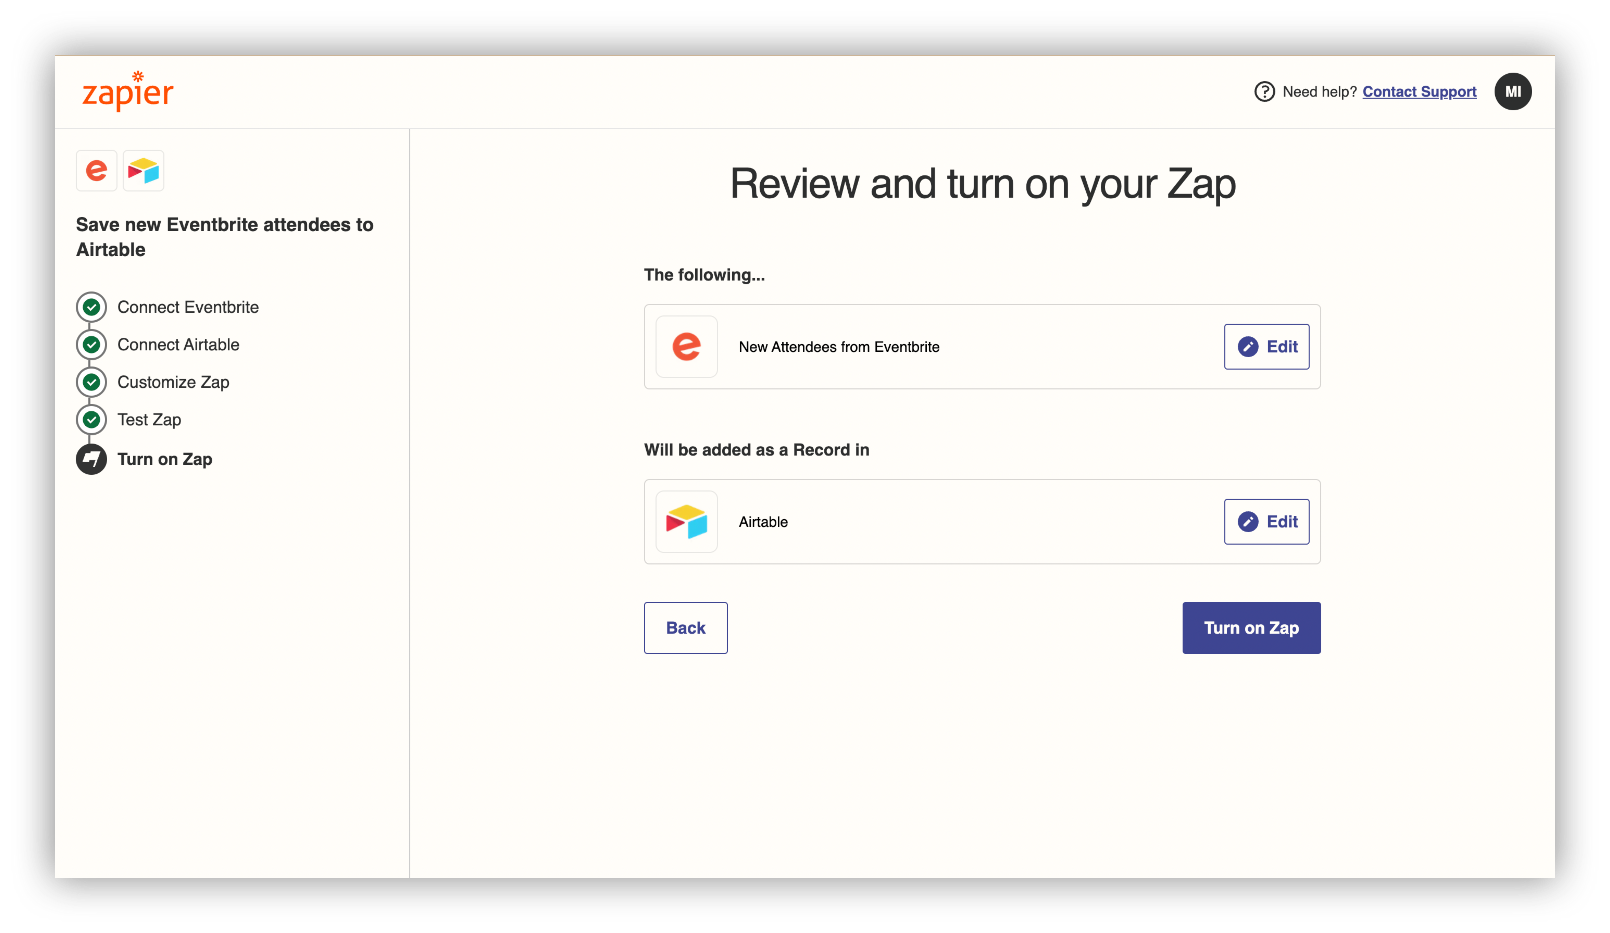
That would be it. You can always manage your Zap, turn it off/on, and even delete it if there is a need.
One of the best things about Airtable is its flexibility.
Connect your Airtable database to Softr and build beautiful no-code web apps in minutes.
Import Eventbrite events data to Airtable with Make
Next, we move on to Make.
Make (formerly Integromat)is an automation tool as well, but it’s much more customizable and offers a bigger number of modules (request) when importing Eventbrite events data to Airtable.
With Make, you can also watch, create, list, and delete attendees, events, orders, and tickets in your Eventbrite account in an automated manner.
Connect Eventbrite to Make
Step 1: Sign up/sign in to your Make account to enter “My Organization page”.
Step 2: Click “Create a new scenario” to start syncing Eventbrite with Airtable.
Step 3: Select Eventbrite and choose an Eventbrite module to build the scenario.
We’ve chosen the “List Attendees” module for Make to retrieve a list of attendees for our event. You can learn more about the modules here.
Step 4: Connect an Eventbrite account to Make
Step 5: Allow Make to access your Eventbrite account
Step 6: Select the organization or the person whose events you want to list
Step 7: Select the events you want to list
Step 8: Choose the status of attendees you want to track.
Step 9 (optional): Enter the date and time to list event attendees that were modified after a specific time period.
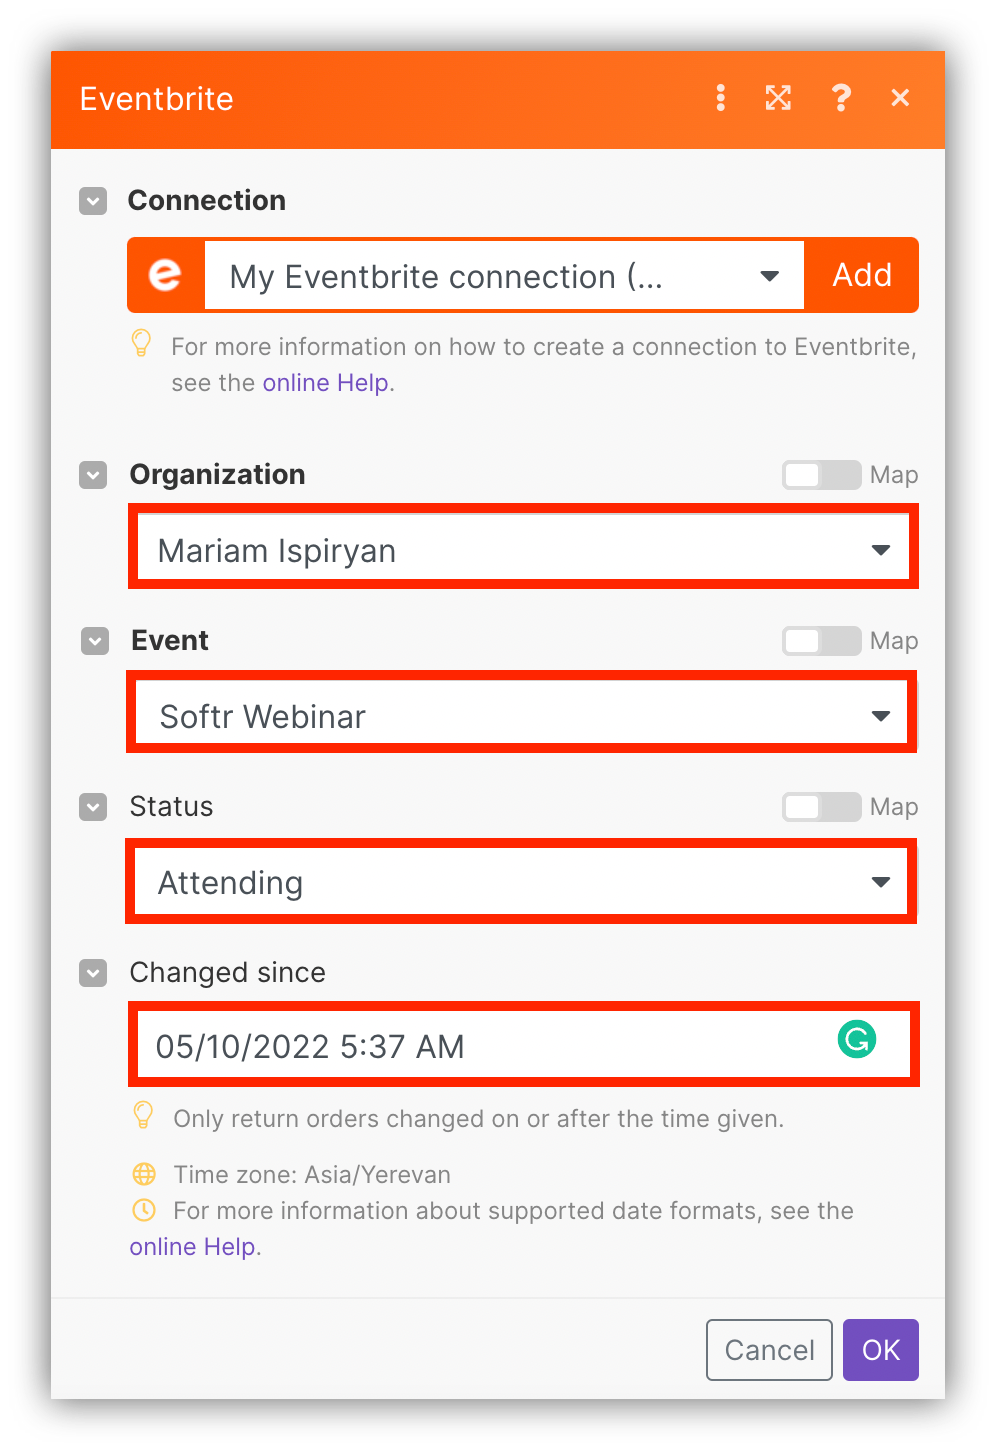
Step 10: Run the module once, to check if it works.
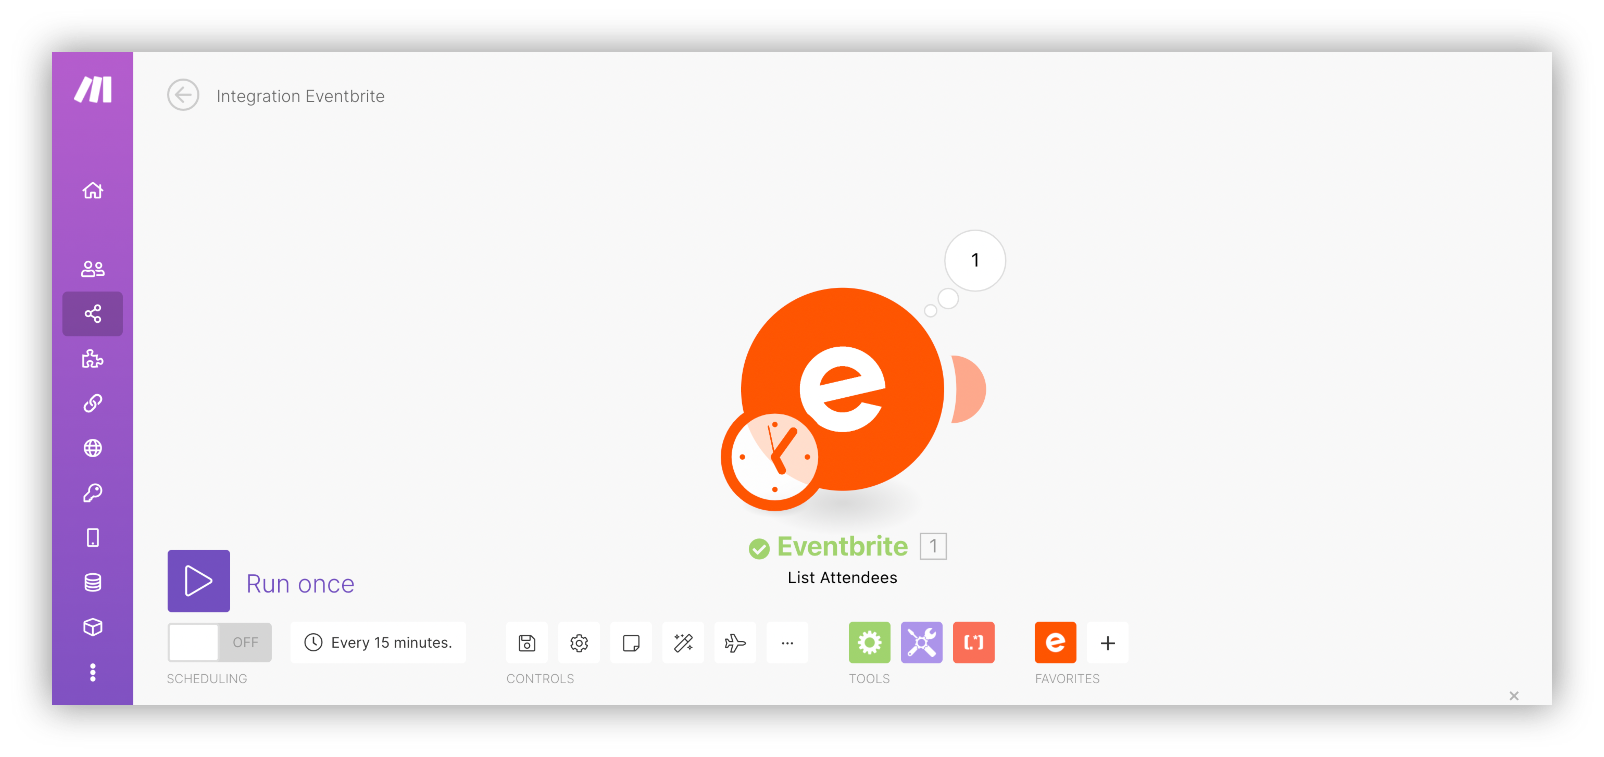
The next part of the syncing process is connecting Airtable to Make.
Connect Airtable to Make
Step 1: Click on the + button on the lower right corner of the page.
Step 2: On the opened dialog, find Airtable and select the right action.
Step 3: Select the “Create a new record” trigger, to have the attendee’s data imported to the table automatically.
Step 4: Connect an Airtable account by clicking “Add” and entering your Airtable API key.
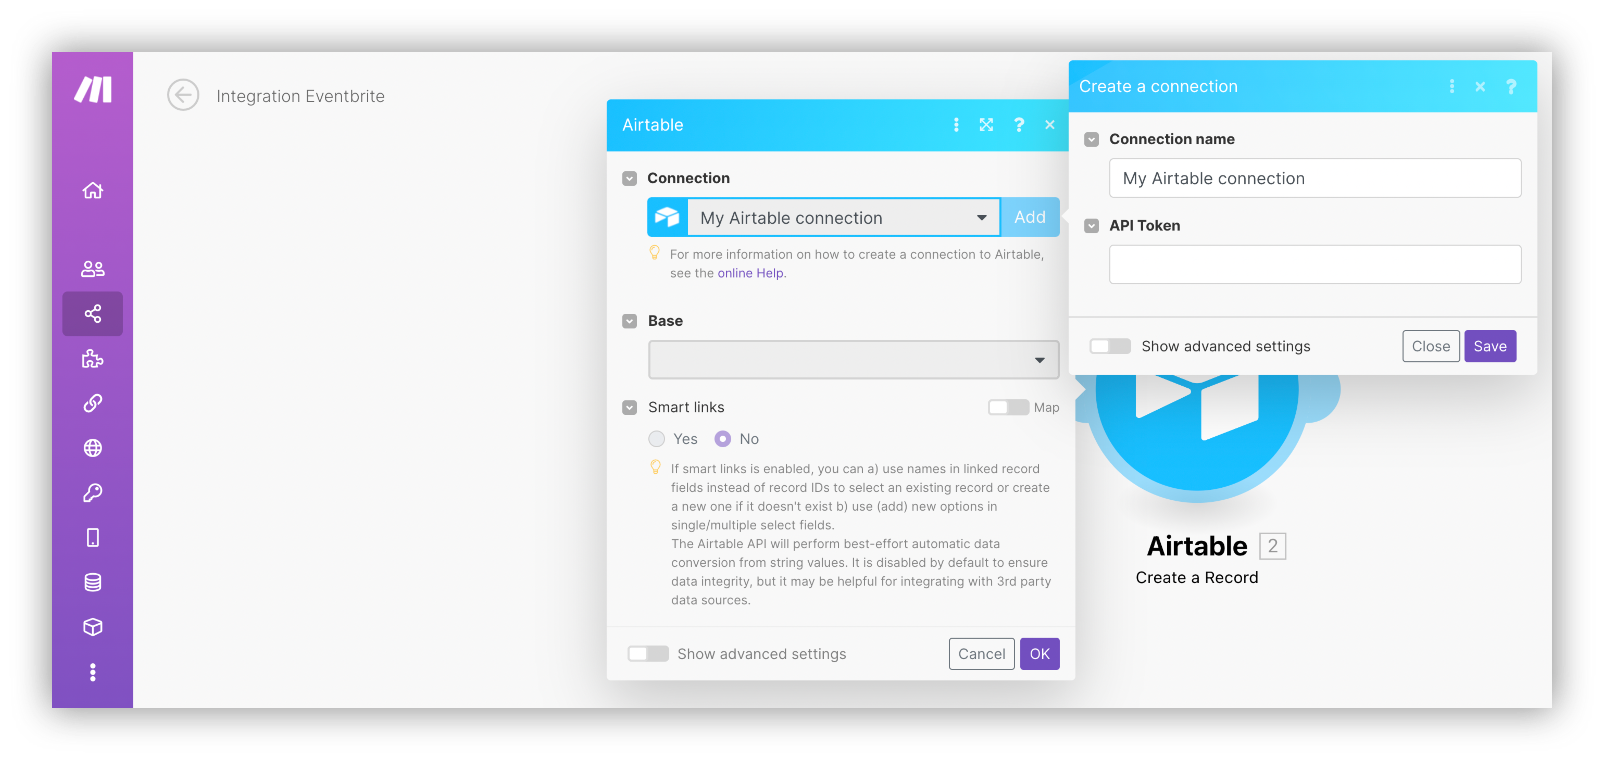
Step 5: Select an output Base and a Table to create new records.
Step 6: Select records to import your Eventbrite data.
We wanted to list the First Name, Last Name, Status, and Email of the attendees in the output table.
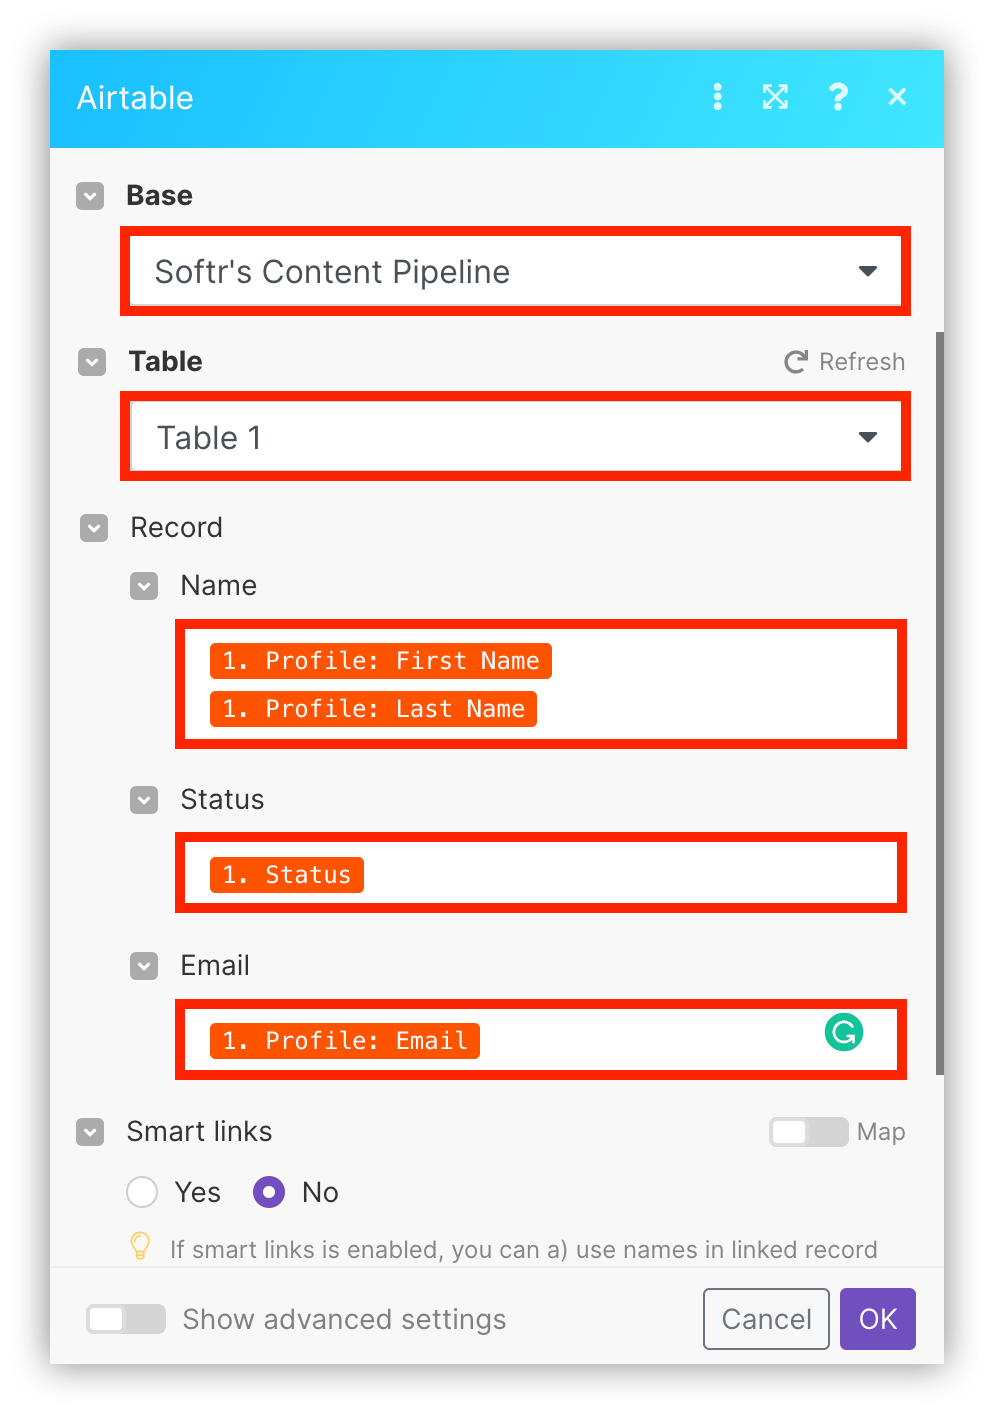
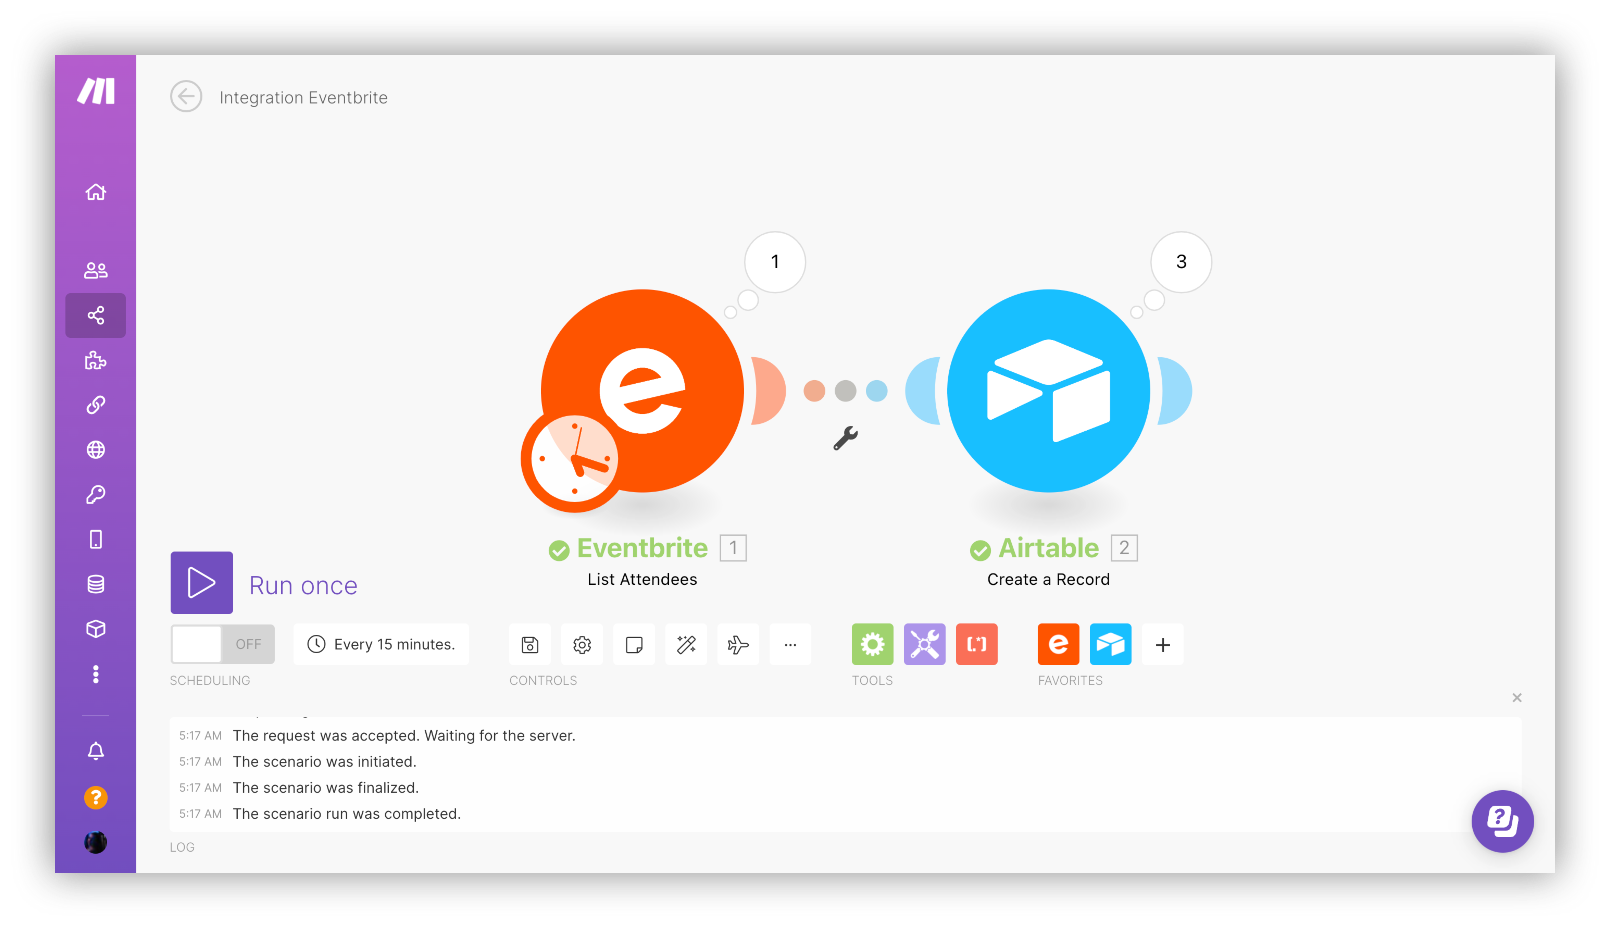
Step 7: Run your scenario one to check if your data is imported to Airtable records successfully.
One of the best things about Airtable is its flexibility.
Connect your Airtable database to Softr and build beautiful no-code web apps in minutes.
Final Thoughts
We've provided the most effective ways to connect Airtable to Eventbrite so you can easily import event data. Going through this process may seem fairly complicated and time-consuming, to begin with, but It will definitely save you time and effort if you follow the steps we have in the guide. Good luck!